Making your own baby food is one of the most rewarding decisions you can make as a new parent. When I first started feeding my daughter solids, I was shocked at how simple the process actually was. You don’t need culinary training or expensive equipment to create nutritious, delicious meals that your baby will love. Learning how to make homemade baby food gives you complete control over what goes into your little one’s body while often saving significant money compared to store-bought options.
Parents often ask me whether the effort is worth it. After tracking my expenses for three months, I found that homemade baby food costs about 45% less than buying pre-made jars and pouches. A single sweet potato makes roughly 10 servings for under $1, while commercial pouches run $1.50 to $2.50 each. Beyond the savings, you avoid added sugars, preservatives, and excessive sodium that many commercial products contain.
Most babies are ready to start exploring solid foods between 4 and 6 months of age. Every child develops at their own pace, so age alone shouldn’t be your only guide. This comprehensive guide will walk you through everything you need to know about making baby food at home, from choosing the right equipment to creating age-appropriate recipes and storing everything safely.
Table of Contents
When to Start Solids: Signs Your Baby is Ready
Babies typically show readiness for first foods between 4 and 6 months of age. The American Academy of Pediatrics recommends waiting until around 6 months when possible, as this aligns better with developmental milestones and digestive maturity.
Your baby will tell you when they’re ready through specific physical signs. They should be able to sit upright with minimal support and hold their head steady without wobbling. Good head control prevents choking and helps them swallow properly. Another clear sign is the loss of the tongue-thrust reflex, which automatically pushes foreign objects out of their mouth. When this reflex fades, your baby can move food from the front of their mouth to the back for swallowing.
Watch for genuine interest in food during family meals. Does your baby watch you eat with curiosity? Do they reach toward your plate or open their mouth when food approaches? These social cues indicate psychological readiness alongside physical development.
Weight milestones matter too. Most pediatricians recommend starting solids when babies have doubled their birth weight and weigh at least 13 pounds. Always discuss timing with your child’s doctor, especially if there are health concerns or feeding difficulties.
Essential Equipment for Making Baby Food
You probably already own most of what you need to make excellent baby food at home. The beauty of DIY baby food is its simplicity. Fancy gadgets are nice but absolutely not necessary for creating nutritious purees and mashes.
A standard food processor or blender works perfectly for creating smooth purees. I used my regular kitchen blender for the first six months without any issues. An immersion blender offers easier cleanup since you can puree directly in the pot. For small batches, even a fork or potato masher creates appropriate textures for older babies.
For cooking, a steamer basket in a regular pot preserves more nutrients than boiling vegetables directly in water. A microwave steamer works equally well if you prefer. Baking sheets become essential when you move to roasting vegetables, which concentrates flavors beautifully.
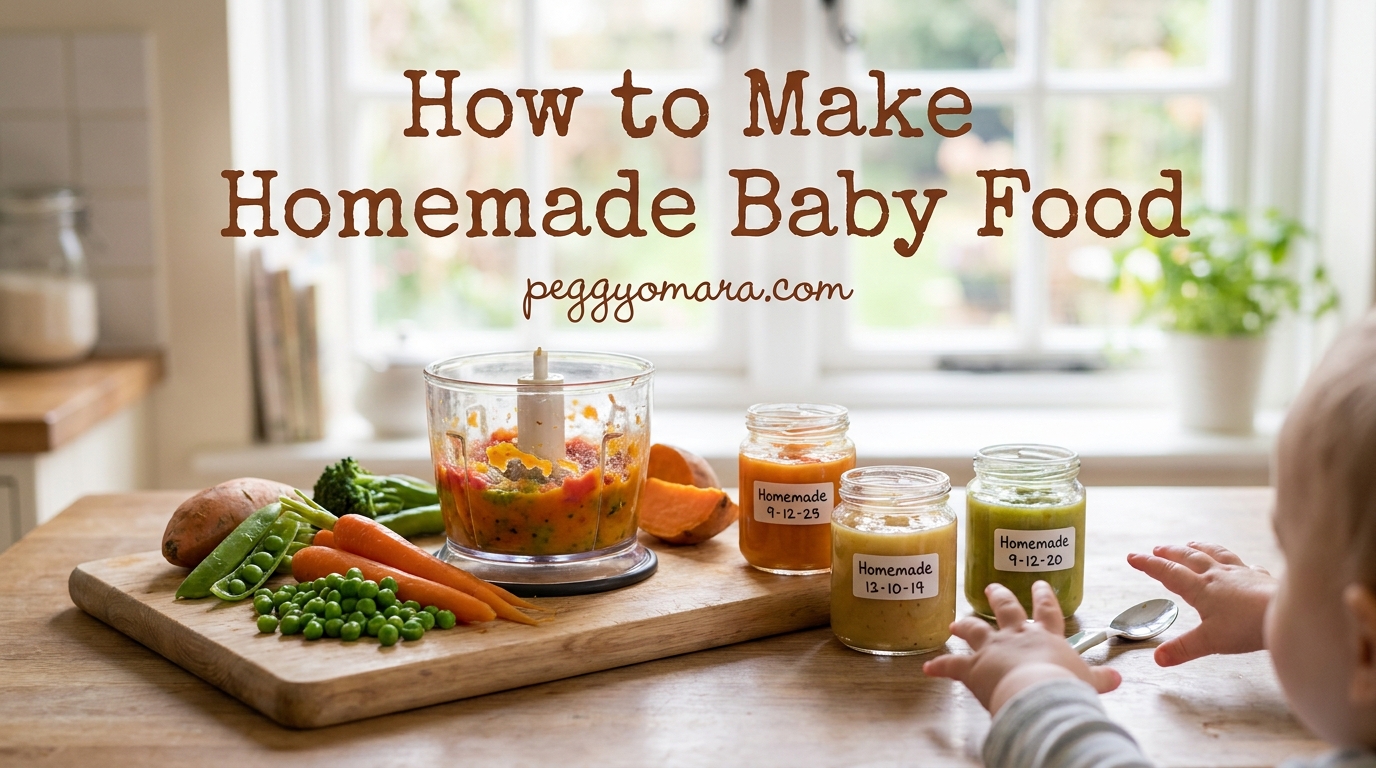
Storage containers represent your most important investment. Ice cube trays with lids create perfect single-serving portions that freeze quickly and thaw easily. Look for BPA-free silicone trays specifically designed for baby food. Small glass containers with airtight lids work well for refrigerator storage of items you’ll use within 24-48 hours.
If you plan to make baby food regularly, you might consider one of the best baby food makers that combine steaming and blending in one appliance. These all-in-one devices save time and reduce cleanup, though they aren’t essential for success.
How to Make Homemade Baby Food: Stage 1 Recipes (4-6 Months)
Stage 1 baby food consists of single-ingredient purees with a very smooth, thin consistency. These first foods introduce your baby to new flavors and textures while allowing you to monitor for any allergic reactions. Start with vegetables before fruits to help develop a palate that isn’t solely focused on sweetness.
1. Sweet Potato Puree
Sweet potatoes make an ideal first food thanks to their natural sweetness, smooth texture when cooked, and impressive nutritional profile. They’re packed with beta-carotene for eye development, vitamin C for immune support, and fiber for healthy digestion.
Wash one medium sweet potato thoroughly and pierce the skin several times with a fork. Bake at 400 degrees Fahrenheit for 45-60 minutes until completely soft when squeezed. Let it cool, then peel away the skin which should slip off easily. Scoop the flesh into a blender with 2-4 tablespoons of water, breast milk, or formula to achieve a thin, smooth consistency. Blend until no lumps remain, adding more liquid as needed.
2. Carrot Puree
Carrots offer a mild, slightly sweet flavor that most babies accept readily. They’re rich in vitamin A, antioxidants, and provide a vibrant orange color that makes feeding time visually engaging.
Peel and chop 3-4 medium carrots into uniform half-inch pieces. Steam them in a basket over boiling water for 8-10 minutes until they pierce easily with a fork. Alternatively, simmer in a covered pot with 1/2 inch of water for 10-12 minutes. Transfer the carrots to a blender with 2 tablespoons of the steaming liquid or fresh water. Puree until completely smooth, adding more liquid one tablespoon at a time to reach the desired thin consistency.
3. Avocado Mash
Avocado stands out as a unique first food because it requires zero cooking. This creamy fruit provides healthy fats essential for brain development, plus it’s incredibly quick to prepare during busy mornings.
Select a ripe avocado that yields slightly when gently pressed. Cut it in half lengthwise and remove the pit. Scoop the flesh into a bowl and mash thoroughly with a fork until completely smooth. For younger babies just starting solids, thin the mash with a tablespoon of breast milk, formula, or water. Serve immediately as avocado browns quickly, though a squeeze of lemon juice can delay oxidation slightly.
4. Banana Puree
Bananas represent another no-cook option that’s perfect for travel or quick meals. They’re naturally sweet, gentle on digestion, and provide potassium and vitamin B6 for growing bodies.
Choose a ripe banana with brown spots for the sweetest flavor and softest texture. Peel and break into chunks in a bowl. Mash with a fork until smooth, adding a splash of liquid if needed for younger babies. For an ultra-smooth puree, blend for 30 seconds. Riper bananas puree more easily and require less additional liquid.
5. Apple Puree
Apples provide a familiar, mildly sweet flavor that complements many other foods. They’re high in fiber and vitamin C, though they do require cooking to soften sufficiently for purees.
Peel, core, and chop 2 medium apples into small pieces. Place in a pot with 1/4 cup water and simmer covered for 8-10 minutes until completely soft. Alternatively, steam for 10-12 minutes. Transfer to a blender with the cooking liquid and puree until smooth. Apples naturally contain pectin, so the puree thickens as it cools. Add more liquid if needed to maintain a thin consistency suitable for beginners.
6. Pea Puree
Green peas pack impressive protein and iron content for a vegetable, making them nutritionally valuable first foods. Their bright green color also exposes babies to diverse visual food experiences.
Use frozen peas for consistent quality year-round. Steam 1 cup of peas for 3-5 minutes until bright green and tender. Don’t overcook or they’ll lose color and nutrients. Transfer to a blender with 2 tablespoons of steaming liquid. Peas have tough skins that require thorough blending, so process for 1-2 minutes until completely smooth. Pass through a fine mesh strainer if needed to remove stubborn skin fragments for very young babies.
Stage 2 Baby Food Recipes (7-9 Months): Combination Purees
Stage 2 introduces combination foods that blend multiple flavors and nutrients. At this stage, purees can be slightly thicker with more texture as your baby develops swallowing skills. Continue introducing new ingredients one at a time within combinations to monitor for allergies.
1. Apple Sweet Potato Blend
This naturally sweet combination provides fiber, vitamin A, and vitamin C in a flavor profile babies love. The familiar sweetness of apples helps acceptance of the nutrient-dense sweet potato.
Peel and chop 1 medium sweet potato and 1 medium apple. Steam together for 12-15 minutes until both are fork-tender. Blend with 2-3 tablespoons of steaming liquid until smooth with a slightly thicker consistency than stage 1 purees. The natural sweetness means no added sugars are needed.
2. Carrot Pea Squash Medley
This vibrant orange-green mixture exposes babies to varied vegetable flavors while providing beta-carotene, protein, and fiber. The mild sweetness of carrots and squash balances the earthier pea flavor.
Steam 1 chopped carrot, 1/2 cup peas, and 1 cup cubed butternut squash together for 15 minutes until all vegetables are soft. Reserve the steaming liquid. Blend with 3 tablespoons of liquid until smooth but slightly textured. The squash creates a creamy base that carries the other flavors beautifully.
3. Blueberry Banana Oatmeal
Introducing grains becomes appropriate around 8 months, and oatmeal provides iron and fiber that babies need. This breakfast-style combination delivers antioxidants from blueberries and potassium from bananas.
Cook 1/4 cup steel-cut or rolled oats according to package directions until very soft. Steam 1/2 cup blueberries for 5 minutes to soften skins and break them down slightly. Mash 1 ripe banana. Combine all three ingredients and blend or mash together with 2 tablespoons of water, breast milk, or formula. The oatmeal thickens the mixture, so add liquid as needed for a spoonable but not runny consistency.
4. Chicken Sweet Potato
Meat provides heme iron that absorbs more efficiently than plant-based iron sources. Combining chicken with sweet potato creates a complete meal with protein, healthy fats, and complex carbohydrates.
Cut 4 ounces boneless skinless chicken breast into small pieces. Simmer in a small pot with 1/2 cup low-sodium broth or water for 15-20 minutes until cooked through to 165 degrees Fahrenheit internal temperature. Meanwhile, bake or steam 1 medium sweet potato until soft. Combine cooked chicken and sweet potato in a blender with 3-4 tablespoons of cooking liquid. Puree until smooth, adding more liquid to reach a soft, spoonable consistency.
5. Lentil Vegetable Blend
Lentils provide plant-based protein, iron, and fiber that supports digestive health. They cook quickly and create a naturally creamy texture that blends well with vegetables.
Rinse 1/2 cup red or yellow lentils and simmer in 1 cup water for 15-20 minutes until completely soft and falling apart. Steam 1 chopped carrot and 1/2 cup cauliflower florets until tender, about 10 minutes. Combine cooked lentils and vegetables with 2 tablespoons of steaming liquid. Blend or mash to a textured consistency appropriate for 7-9 month olds.
6. Pear Spinach Yogurt
Dairy yogurt introduces calcium and probiotics once your pediatrician approves dairy, typically around 8-9 months. The natural sweetness of pear masks the spinach flavor that some babies initially resist.
Peel, core, and chop 1 ripe pear. Steam for 5-7 minutes until soft. Steam 1/2 cup fresh spinach for just 2-3 minutes until wilted to preserve nutrients. Let both cool slightly. Combine pear, spinach, and 2 tablespoons plain full-fat Greek yogurt in a blender. Pulse until combined with visible flecks of spinach remaining. The yogurt adds creaminess and protein to this nutrient-dense blend.
Stage 3 Baby Food Recipes (9-12 Months): Chunky Mashes
Stage 3 foods introduce texture progression that prepares babies for family table foods. Mashe d textures with soft lumps help develop chewing skills and jaw strength. You can also begin offering soft finger foods alongside purees.
1. Chunky Vegetable Mash
This transitional recipe maintains the comfort of purees while introducing textural variety that encourages chewing practice. Soft chunks should mash easily between your fingers.
Steam 1 diced carrot, 1/2 cup cauliflower florets, and 1/2 cup diced zucchini together for 10-12 minutes until very soft. Reserve 1/4 cup steaming liquid. Mash roughly with a potato masher or fork, leaving visible chunks about the size of small peas. Add cooking liquid 1 tablespoon at a time to achieve a soft but textured consistency. The pieces should squish easily between your fingers but retain their shape.
2. Soft Scrambled Eggs with Veggies
Eggs provide complete protein, choline for brain development, and healthy fats. Soft scrambled eggs make an excellent finger food or mash texture for this age group.
Finely dice 2 tablespoons each of bell pepper and spinach. Sauté in a small pan with a teaspoon of olive oil for 2 minutes until softened. Whisk 1 egg and pour into the pan. Cook over low heat, stirring constantly, until just set but still very soft. Chop or mash to a textured consistency appropriate for your baby’s skill level. Ensure eggs are fully cooked but not rubbery.
3. Ground Turkey with Sweet Potato
This protein-rich combination provides iron and zinc while offering textural contrast between the grainy meat and smooth potato. It’s essentially a baby-friendly version of shepherd’s pie filling.
Brown 4 ounces lean ground turkey in a pan, breaking into very fine crumbles. Cook until no pink remains and internal temperature reaches 165 degrees Fahrenheit. Bake 1 medium sweet potato until soft. Mash the sweet potato with a fork, leaving some small lumps. Stir in the cooked ground turkey. Add 1-2 tablespoons of water or low-sodium broth if needed for moisture. The result should be soft, moist, and contain visible but small pieces.
4. Mashed Beans and Rice
Beans provide plant-based protein, fiber, and iron. Combined with rice, they create a complete protein source that supports steady energy and satiety.
Cook 2 tablespoons white or brown rice in 1/2 cup water until very soft, about 25-30 minutes. Rinse and drain 1/4 cup canned low-sodium black beans or pinto beans. Warm the beans with 2 tablespoons water for 2-3 minutes. Mash the beans partially with a fork, leaving about half whole or in large pieces. Combine with the cooked rice and mash together. The mixture should hold together but show distinct rice grains and bean pieces throughout.
Food Safety Guidelines: The 3-Day and 4-Day Wait Rules
Food safety becomes paramount when feeding infants whose immune systems are still developing. Understanding proper food handling, allergen introduction protocols, and choking prevention keeps your baby safe during this exciting transition.
The 3-Day Wait Rule Explained
The 3-day wait rule means introducing one new food at a time and waiting three full days before introducing another new ingredient. This practice allows time to identify allergic reactions, which typically appear within minutes to 72 hours of consuming a trigger food.
Watch for signs of allergic reaction including hives, rash, vomiting, diarrhea, wheezing, or swelling of the face, lips, or tongue. If any symptoms appear, stop feeding that food immediately and contact your pediatrician. Document reactions in a feeding journal to share with your healthcare provider.
The 4-Day Wait Rule for High-Risk Allergens
Some pediatricians recommend extending the wait period to four days when introducing high-risk allergenic foods. These include eggs, dairy, wheat, soy, peanuts, tree nuts, fish, and shellfish. The extra day provides additional observation time for delayed reactions.
Current research actually suggests that early introduction of allergens, particularly peanuts and eggs, may reduce allergy risk. However, introduction should happen under pediatrician guidance, especially if your family has a history of food allergies, eczema, or asthma.
Choking Hazard Prevention
Choking represents the most immediate food safety risk for babies learning to eat. Never leave your baby unattended during meals. Ensure they’re sitting upright in a high chair, not reclined in a stroller or car seat.
Avoid these high-risk choking foods until your child is at least 4 years old: whole grapes, cherry tomatoes, hot dogs, hard candy, popcorn, raw carrots, whole nuts, and chunks of meat or cheese. When in doubt, mash or puree to a smooth consistency.
Temperature and Storage Safety
Always test food temperature before serving. Warm food to body temperature or slightly warmer, never hot. Stir thoroughly to eliminate hot spots that form when microwaving. Test on your inner wrist, it should feel warm, not hot.
Meats require special attention. Poultry should reach 165 degrees Fahrenheit internal temperature, while beef, pork, and fish should reach 145 degrees. Use a food thermometer for accuracy. Never feed babies under 12 months honey, as it can contain Clostridium botulinum spores that cause infant botulism. Their digestive systems cannot yet handle this bacterium safely.
How to Store and Freeze Homemade Baby Food in 2026?
Proper storage extends the life of your homemade baby food while preserving nutrients and flavor. Understanding refrigerator and freezer guidelines ensures you always have safe, fresh food available.
Refrigerator Storage Guidelines
Fresh homemade baby food lasts 48 hours in the refrigerator when stored in airtight containers. Purees with meat or dairy should be used within 24 hours. Always refrigerate food within 2 hours of cooking to prevent bacterial growth.
Store food in small glass containers with tight-fitting lids or BPA-free plastic containers designed for baby food. Keep containers at the back of the refrigerator where temperatures remain most consistent. Avoid door storage where temperature fluctuations occur.
The Ice Cube Tray Method
The ice cube tray method creates perfect single-serving portions that thaw quickly. Each cube equals approximately 1-1.5 ounces, ideal for early feeding stages when babies consume small amounts.
Pour freshly made puree into clean ice cube trays, filling each section nearly full. Tap the tray gently to remove air bubbles. Cover with a tight-fitting lid or wrap tightly in plastic wrap. Freeze for 4-6 hours until completely solid.
Once frozen, pop the cubes out and transfer to freezer storage bags labeled with the food type and date. Remove as much air as possible from bags before sealing. Frozen baby food cubes maintain quality for up to 3 months, though they’re safe indefinitely at proper freezer temperatures.
Thawing and Reheating Safely
Thaw frozen baby food cubes in the refrigerator overnight, or use the defrost setting on your microwave. Never thaw at room temperature, which allows bacteria to multiply in the food’s outer layers while the center remains frozen.
Alternatively, place a frozen cube in a small bowl set inside a larger bowl of warm water. Stir occasionally until thawed. Heat thawed food to body temperature before serving. Stir thoroughly to eliminate hot spots from uneven heating.
Discard any food that has been thawed and heated but not eaten. Do not refreeze thawed baby food, as this creates opportunities for bacterial growth. Once a container has been opened or a portion served, use within 24 hours.
Batch Cooking Strategies for Busy Parents
Many parents abandon homemade baby food because they perceive it as time-consuming. Strategic batch cooking transforms food prep from a daily chore into a weekly 2-hour session that yields a freezer full of variety.
I prepare baby food every Sunday afternoon while my husband entertains our daughter. In 90 minutes, I create 2-3 weeks worth of food cubes. The key is working efficiently: steam multiple vegetables simultaneously in separate baskets, bake sweet potatoes and squash together on one sheet, and blend in batches while things cook.
Start with a simple weekly rotation: Sunday prep day creates purees for Monday through Thursday. Friday becomes “leftover day” using up any refrigerator items. Weekend meals might feature fresh mashes of avocado or banana that require no cooking.
For working parents, prioritize freezer-friendly options. Single-ingredient vegetable purees freeze beautifully and thaw quickly. Prepare combinations fresh when possible, as they sometimes separate or change texture when frozen. Cooked grains and dairy-based recipes generally don’t freeze well, so make these fresh in smaller batches.
Invest in a labeling system. I use freezer tape and a permanent marker to note contents and preparation date on every bag. Organize your freezer by food type or age stage so you can quickly grab what you need during busy mornings. A dedicated baby food bin prevents smaller bags from getting lost behind larger items.
Troubleshooting Common Issues
Even with the best preparation, feeding challenges arise. Understanding how to handle common problems reduces stress and keeps mealtimes positive for both you and your baby.
Handling Food Refusal
Babies reject food for many reasons unrelated to taste. They might be full, tired, uncomfortable, or simply not hungry. Never force-feed or create pressure around eating. This creates negative associations that persist for years.
When my daughter refused carrots repeatedly, I stopped offering them for two weeks. Upon reintroduction, she accepted them readily. Babies sometimes need 10-15 exposures before accepting a new food. Stay patient and keep mealtimes low-pressure.
Try changing the texture if rejection persists. Some babies prefer thinner purees, others want more texture. Serve food at different temperatures, room temperature often works better than warm for some infants. Mix rejected foods with accepted favorites to increase familiarity.
Preventing and Treating Constipation
Dietary changes commonly cause constipation when starting solids. The introduction of solid food changes digestion significantly. Prevent issues by prioritizing high-fiber foods like pears, prunes, peaches, and peas.
Bananas and rice cereal, while popular first foods, can be constipating for some babies. Balance these with the “P fruits” known for their laxative effect: prunes, pears, peaches, and plums. Offer small amounts of water with meals once your pediatrician approves, typically around 6 months.
If constipation occurs, offer pureed prunes or pears daily until regularity returns. Gentle bicycle leg movements and warm baths can also help stimulate bowel movements. Contact your pediatrician if constipation persists more than 3 days or causes significant discomfort.
Fixing Texture Problems
Puree too thick? Add liquid one tablespoon at a time: water, breast milk, formula, or low-sodium broth all work. Breast milk adds familiar flavor that some babies prefer.
Too thin? Add instant baby cereal, mashed banana, avocado, or potato flakes to absorb excess liquid. Alternatively, return the puree to a pan and simmer gently until excess moisture evaporates.
Lumpy purees for young babies indicate insufficient blending. Process longer or push through a fine mesh strainer to remove stubborn pieces. For older babies, those same lumps provide appropriate texture progression.
Frequently Asked Questions
What do you need to make your own baby food?
You need minimal equipment to make baby food at home. Essential items include a cooking method (pot with steamer basket or microwave), a blending tool (standard blender, food processor, immersion blender, or even just a fork for mashes), and storage containers (ice cube trays with lids for freezing, small airtight containers for refrigeration). You likely already own most of these. Optional additions include a food thermometer for meat safety and specialized baby food storage containers.
Is it really cheaper to make your own baby food?
Yes, homemade baby food is significantly cheaper than store-bought. A single sweet potato costing around $0.80 produces approximately 10 servings, making each serving about $0.08. Commercial baby food pouches typically cost $1.50 to $2.50 each. Over a year of feeding, parents save an estimated $500 to $1,200 by making food at home. The savings increase when using seasonal produce and buying vegetables in bulk.
What are the cons of homemade baby food?
The primary drawbacks include time investment for preparation and cleanup, freezer space requirements for storage, and shorter shelf life compared to commercially processed options with preservatives. Some parents worry about food safety without the sterilization processes used by manufacturers. There’s also the risk of food refusal after you’ve invested effort in preparation. Many families solve these issues through batch cooking and using a combination approach with store-bought backups for busy days.
What is the 3 day rule for baby food?
The 3-day wait rule means introducing one new food to your baby and waiting three full days before introducing another new ingredient. This practice allows time to observe for allergic reactions, which typically appear within minutes to 72 hours. Signs of allergy include hives, rash, vomiting, diarrhea, wheezing, or facial swelling. If no reaction occurs after three days, that food is considered safe and can be combined with other previously introduced ingredients.
What is the 4 day rule for baby food?
The 4-day wait rule extends the observation period to four days when introducing high-risk allergenic foods. This applies to eggs, dairy products, wheat, soy, peanuts, tree nuts, fish, and shellfish. The extra day provides additional time to catch delayed allergic reactions. Some pediatricians recommend this extended wait for all new foods, especially if your family has a history of allergies, eczema, or asthma. Always consult your pediatrician for personalized guidance on allergen introduction.
What do the Japanese feed babies?
Japanese baby feeding, known as okazu, emphasizes rice-based dishes, miso soup, soft tofu, and gently seasoned vegetables. Traditional first foods include okayu (rice porridge), pureed pumpkin, daikon radish, and small amounts of finely flaked fish. The Japanese approach introduces diverse flavors early, including mild seasonings like minimal soy sauce and dashi broth. Fermented foods play a significant role, with miso and yogurt commonly offered. The philosophy focuses on seasonal, fresh ingredients and teaching children to appreciate natural flavors without heavy reliance on sweetness.
Final Thoughts
Learning how to make homemade baby food empowers you to nourish your child with fresh, nutrient-dense meals while maintaining complete control over ingredients. The process is far simpler than most parents initially expect, requiring minimal equipment and basic cooking skills. Starting with single-ingredient purees at 4-6 months, progressing through combination foods at 7-9 months, and introducing textured mashes by 9-12 months follows your baby’s natural developmental timeline.
Remember that perfection isn’t the goal. Some batches will be too thick, others too thin. Your baby will reject foods you spent time preparing, then suddenly love them a month later. This variability is completely normal. What matters most is creating positive mealtime experiences that set the foundation for lifelong healthy eating habits.
Start small with just one or two homemade purees per week, supplementing with store-bought options as needed. As confidence grows, expand your repertoire and batch sizes. Many parents find that Sunday afternoon prep sessions become enjoyable rituals rather than chores. By the time your baby transitions to family foods around 12 months, you’ll have developed cooking habits and flavor combinations that benefit the entire family’s nutrition.