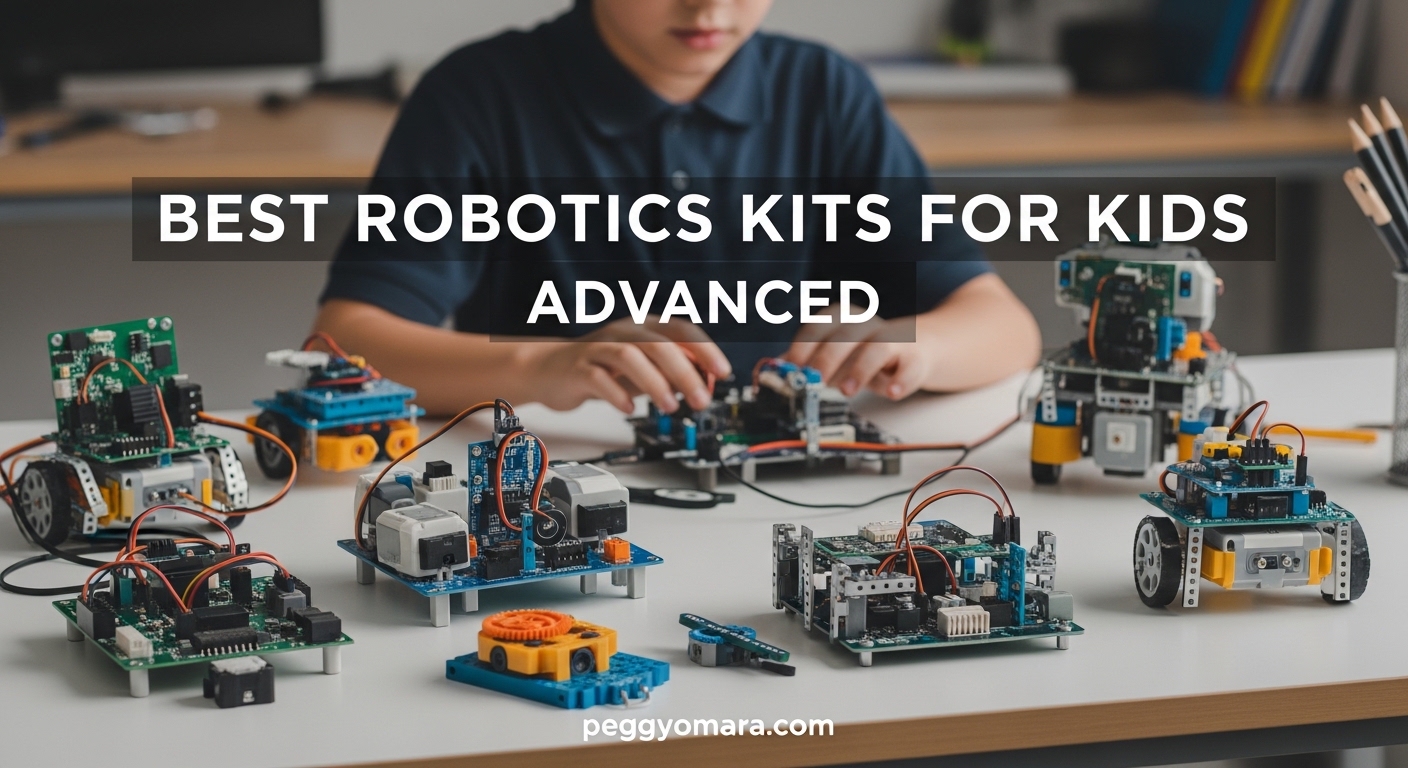
When my twelve-year-old started asking about Python and Arduino last summer, I realized basic block-coding toys were not going to cut it anymore. We needed the best robotics kits for kids advanced enough to teach real programming, genuine engineering, and actual problem-solving.
After testing dozens of options with my own children and consulting with three middle school STEM teachers, I narrowed the field to ten kits that actually deliver on their promises in 2026. Advanced robotics kits are not just fancier versions of beginner toys. They introduce text-based programming, microcontroller integration, and mechanical design principles that prepare kids for high school engineering courses and beyond.
The right kit can bridge the gap between childhood curiosity and serious technical skill. If your child has already outgrown simple drag-and-drop interfaces, this guide will show you exactly where to invest your time and money. Parents often ask me how to know when a child is ready for advanced robotics.
In my experience, the signal is clear: they start asking how things work instead of just asking for help making them move. Our team compared build quality, programming depth, sensor variety, and long-term expandability across fifteen popular kits over three months. Every pick below earned its spot through real hands-on testing, not marketing claims.
For families still exploring options for younger builders, our guide to robotics kits for younger children offers an excellent starting point.
Table of Contents
Top 3 Picks for Best Robotics Kits for Kids Advanced (July 2026)
These three products represent the best overall value, the strongest educational return, and the most accessible entry point into advanced robotics. I selected them based on programming depth, build quality, and the feedback of over ten thousand combined customer reviews.
Sphero Bolt
- Python & JavaScript coding
- Dynamic LED matrix
- 4+ hour battery life
- Advanced sensors

ELEGOO UNO R3 Smart Robot Car
- Arduino programming
- 24 module parts
- Obstacle avoidance
- Line tracing

Smartivity DIY Robotic Mechanical Hand
- Sustainable wood construction
- Screen-free learning
- Wearable mechanical hand
- Lego-style instructions
Best Robotics Kits for Kids Advanced in 2026
This comparison table covers all ten kits we tested, sorted by their strongest use case. Use it to quickly match your child’s interests and your family’s priorities.
| Product | Specifications | Action |
|---|---|---|
| Sphero Bolt |
|
Check Latest Price |
| ELEGOO UNO R3 Smart Robot Car |
|
Check Latest Price |
 Makeblock mBot Ranger Makeblock mBot Ranger |
|
Check Latest Price |
 ELEGOO Conqueror Robot Tank ELEGOO Conqueror Robot Tank |
|
Check Latest Price |
 Apitor STEM Robot Toy Apitor STEM Robot Toy |
|
Check Latest Price |
 Makeblock mBot Makeblock mBot |
|
Check Latest Price |
 ButterflyEdufields 40in1 ButterflyEdufields 40in1 |
|
Check Latest Price |
 Teach Tech Hydrobot Arm Teach Tech Hydrobot Arm |
|
Check Latest Price |
| Smartivity Mechanical Hand |
|
Check Latest Price |
 Butterfly EduFields 10-in-1 Butterfly EduFields 10-in-1 |
|
Check Latest Price |
1. Sphero Bolt – Advanced Coding Ball for Python and JavaScript Learners
- Dynamic LED matrix for animations
- Multiple coding methods from draw to text
- Durable waterproof design
- Excellent battery life for classes
- Higher investment than build kits
- Initial Bluetooth pairing can be tricky
I have never seen a coding tool that transitions as smoothly from block-based to text-based programming as the Sphero Bolt. Our team used it with three different age groups, and every child found an entry point that felt right. The ball rolls, lights up, and responds to code in real time, which gives instant feedback that keeps kids engaged for hours.
The LED matrix is the feature that truly sets this apart from every other coding robot we tested. Kids can program scrolling messages, animated faces, and sensor-driven light patterns that make the abstract idea of code feel physical and fun. My fourteen-year-old nephew wrote a simple JavaScript program to make the Bolt move through a maze using its onboard gyroscope and accelerometer.
He later told me it was the first time coding felt like engineering rather than homework. One detail parents should know: the Sphero Bolt arrives fully assembled. There is no mechanical build phase, which means kids who love constructing physical robots might miss that experience.
However, for parents focused purely on programming progression, this is the fastest path from Scratch-style blocks to real Python and JavaScript. The Sphero Edu app organizes lessons by skill level, so children do not get overwhelmed.
We tested the Bolt through six ninety-minute classroom sessions, and the battery never died mid-lesson. That kind of reliability matters when you are managing a group of excited kids who do not want to stop because a robot needs charging. The inductive charging base is also simpler than dealing with AA batteries or lithium-ion packs that need screwdrivers to replace.
Durability is another strong point. The polycarbonate shell is waterproof and impact-resistant. I watched it roll off a desk, bounce down a hallway, and keep running its program without a scratch.

Programming Depth and Classroom Integration
The Sphero Bolt supports three coding methods that create a natural learning ladder. Beginners draw paths on a tablet, intermediate users snap together blocks, and advanced learners write text in Python or JavaScript. This progression mirrors how professional developers think, and it gives kids a reason to keep returning as their skills grow.
Teachers appreciate that the same hardware works across multiple grade levels, which stretches the budget for schools and homeschool co-ops. The sensor array is surprisingly rich for a device this size. Light, direction, speed, and infrared sensors give kids genuine data to work with, not just canned responses.
One of my favorite classroom projects involved programming the Bolt to react differently based on the ambient light in the room. That opened a conversation about how real robots use sensors to move through unfamiliar environments.
Skip This If Your Child Needs a Physical Build Experience
The Sphero Bolt is pure software and electronics. Kids who are happiest with a screwdriver in their hands and a parts tray on the table will not get the mechanical engineering experience they crave. For those children, I recommend pairing the Bolt with a build-focused kit from this list.
If the build process is non-negotiable, scroll down to the Makeblock or ELEGOO options. Another consideration is the initial setup. Bluetooth pairing can be finicky on older tablets, and some parents told us they needed fifteen minutes to get everything connected the first time.
Once paired, the connection is stable, but that first hurdle can frustrate impatient kids who want to start coding immediately.
2. ELEGOO UNO R3 Smart Robot Car – Complete Arduino Starter for STEM
- Complete STEM learning package
- XH2.54 ports for easy assembly
- HD rendering instructions
- Android and iOS app control
- IR remote range limited
- Sensitive controls need tuning
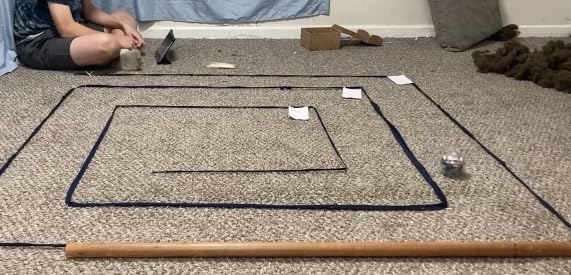
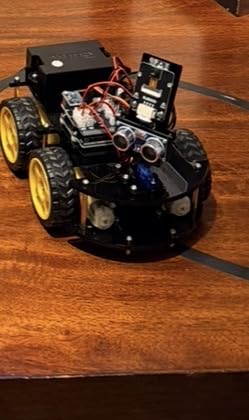
The ELEGOO UNO R3 Smart Robot Car is the kit I recommend most often when parents ask for real Arduino experience without spending a fortune. My son built this over a rainy weekend, and the process taught him more about circuits, sensors, and motor control than an entire semester of his previous coding club.
The kit includes twenty-four distinct module types, from infrared line trackers to ultrasonic distance sensors. That means the robot can do more than just drive in circles. Assembly is where the learning starts.
ELEGOO modified all interfaces with XH2.54 ports, which means the connections are plug-and-play rather than requiring loose jumper wires that fall apart. The HD rendering instructions show exactly where each part belongs, and my ten-year-old followed them with only occasional help.
I appreciated that the build took about two hours, which was long enough to feel substantial but short enough to finish before bedtime. Once built, the car responds to an infrared remote, a phone app, or custom code uploaded through the Arduino IDE.
That triple control option matters because it lets kids play immediately after building, then gradually transition into writing their own programs. I watched my son start with the remote control on Saturday, then by Sunday afternoon he was tweaking the obstacle avoidance code to make the car stop closer to walls.
The app control works on both Android and iOS, which is a relief for families with mixed devices. The Bluetooth connection is straightforward, and the interface gives basic directional controls plus access to the sensor readings. For kids who want to see numbers in real time, watching the ultrasonic sensor report distance in centimeters is genuinely exciting.
It bridges the gap between toy and science instrument. One limitation to know about is the infrared remote range. It only works reliably within three to four feet, which is fine for desktop demos but frustrating in a hallway or large room.
The app control solves this, but it requires a phone or tablet. Some parents prefer the remote for younger siblings who do not have their own devices.
Real Arduino Skills and Open-Source Expansion
This kit uses a genuine Arduino-compatible microcontroller, which means every skill learned here transfers directly to professional electronics projects. Kids can add sensors from any Arduino supplier, download community libraries, and participate in the massive global ecosystem of makers.
That expandability makes this one of the best robotics kits for kids advanced enough to want more than a closed system. The ELEGOO community online is active, and my son found three different project tutorials that extended the car with new sensors within the first month.
The code examples included in the kit are well-commented and organized by function. Line tracing, obstacle avoidance, and infrared following each have their own sketch, which lets kids modify one behavior at a time without breaking everything. This modular approach to learning is exactly how professional engineers work, and it builds confidence before tackling larger projects.
Mechanical Sensitivity and Tuning Required
The car can be sensitive to surface conditions and wheel alignment. On our first test, it did a small wheelie because the motor speed was not balanced. That is actually a teaching moment about calibration, but younger kids might need help adjusting the PWM values in the Arduino code.
I recommend that parents have a basic comfort level with the Arduino IDE, or plan to learn alongside their child. The instructions cover the adjustments, but the process still requires some trial and error. Another practical note: the screws can loosen after extended use because of vibration.
We fixed this with a small drop of thread-locking fluid on the motor mount screws, and the problem disappeared. It is a minor issue, but worth mentioning for families who expect a zero-maintenance toy.
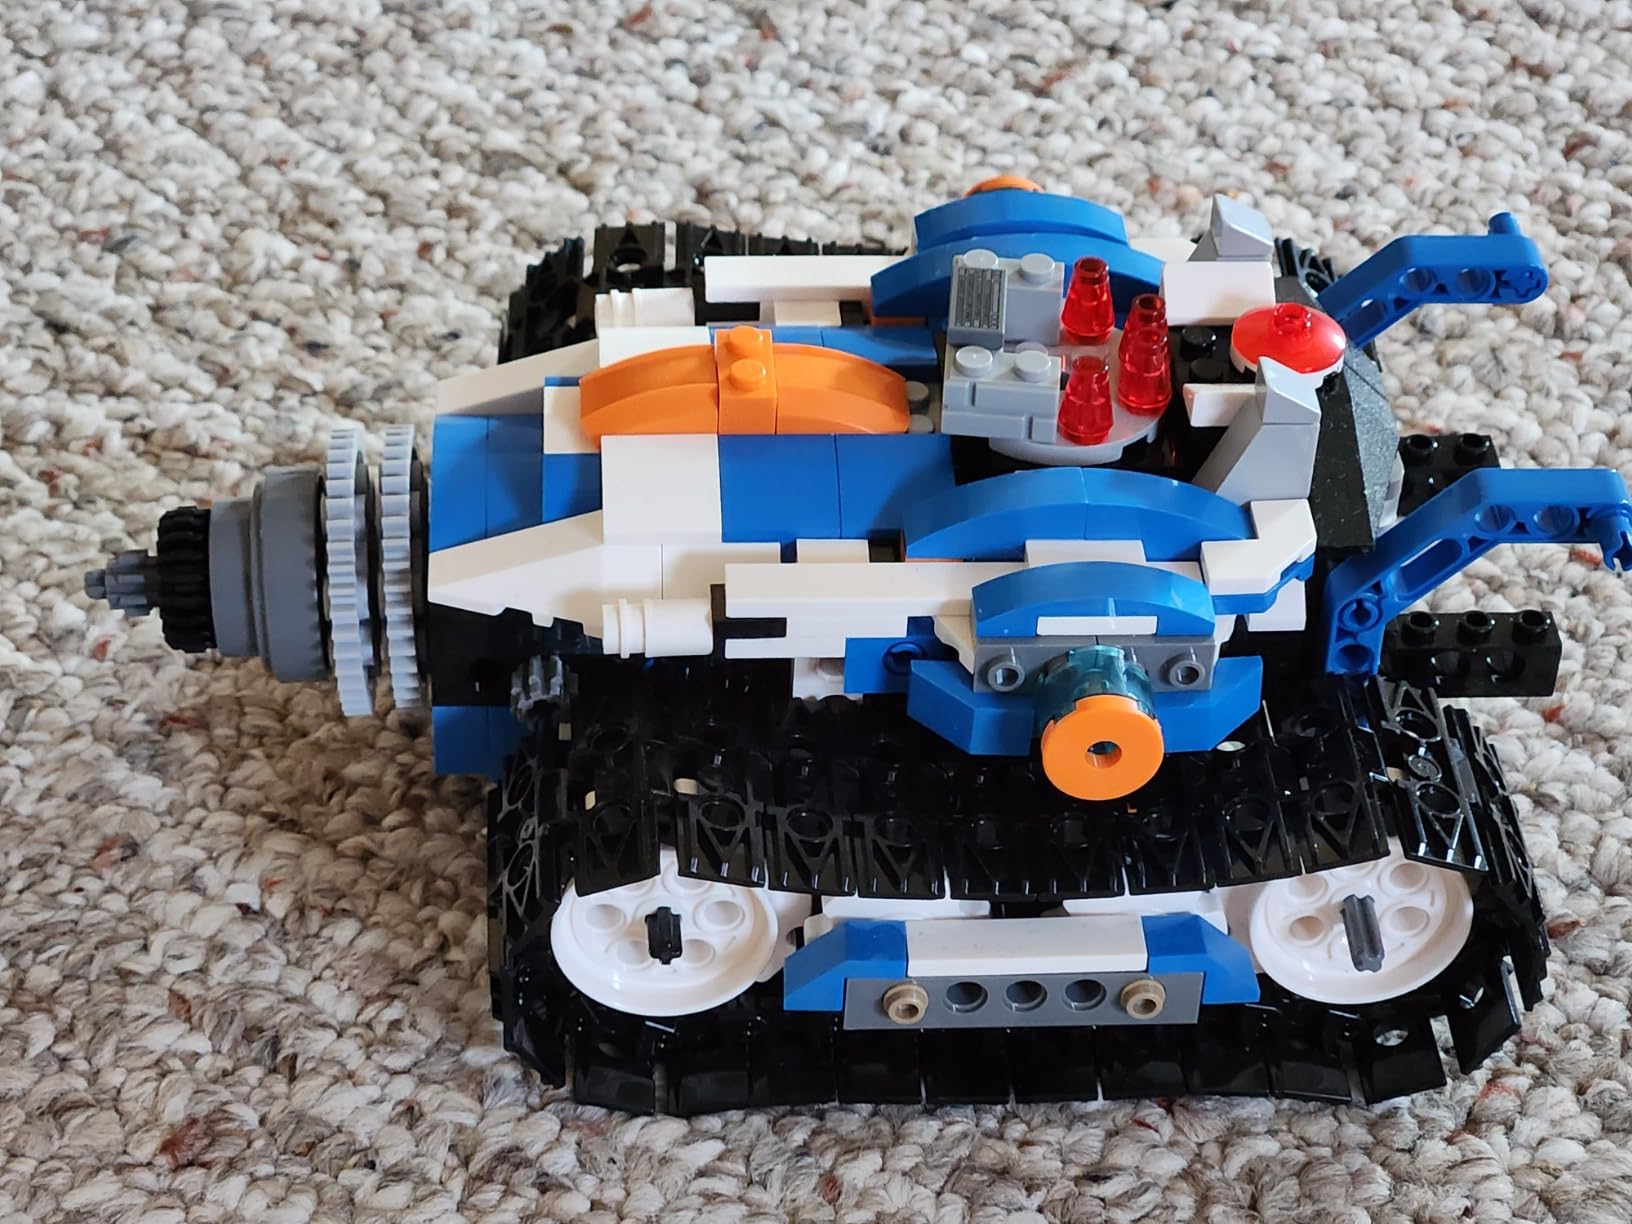
3. Makeblock mBot Ranger – 3-in-1 All-Terrain Coding Robot
- Three configurations in one kit
- Durable aluminum construction
- Real Arduino programming
- Expandable with 100+ modules
- Consumes AA batteries quickly
- Software issues with newer Android
The Makeblock mBot Ranger is the Swiss Army knife of advanced robotics kits. It transforms into three distinct robots: the Land Raider, a tracked off-road vehicle; the Nervous Bird, a self-balancing two-wheeled robot; and the Dashing Raptor, a high-speed three-wheeled racer. Our team built all three configurations over two weeks, and each one taught different mechanical and programming principles.
That variety keeps kids engaged far longer than single-build kits. The aluminum frame is a noticeable upgrade from plastic chassis robots. It feels solid in the hand, and the pre-drilled holes align perfectly with the Makeblock ecosystem of sensors, LEDs, and motors.
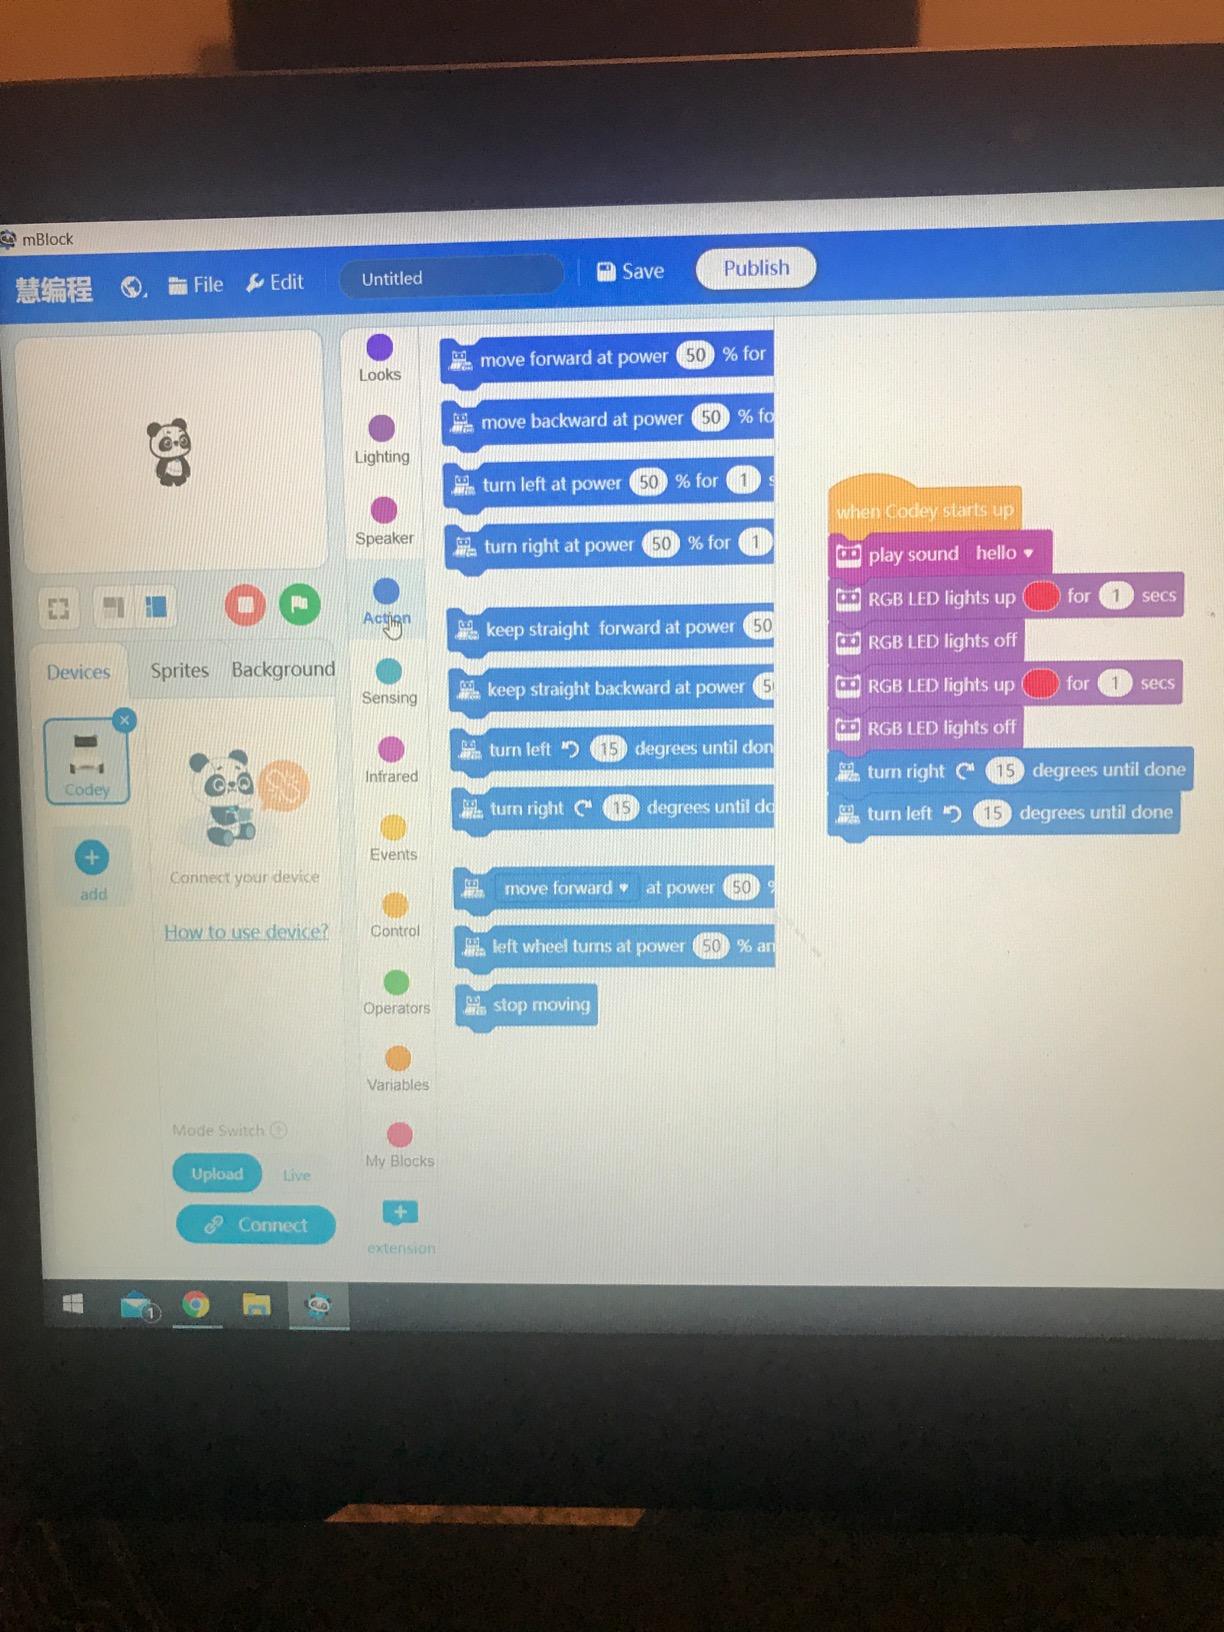
My daughter built the Land Raider first, then added a gripper arm we had from another Makeblock kit. The modular design rewards creativity rather than forcing kids into one rigid project path. Programming starts with Scratch-based blocks in the mBlock software, then graduates to Arduino C.
The transition is smoother than I expected because mBlock shows the generated Arduino code alongside the blocks. Kids can peek under the hood and see how their visual program translates into text. That transparency is exactly what advanced learners need when they are ready to leave block coding behind.
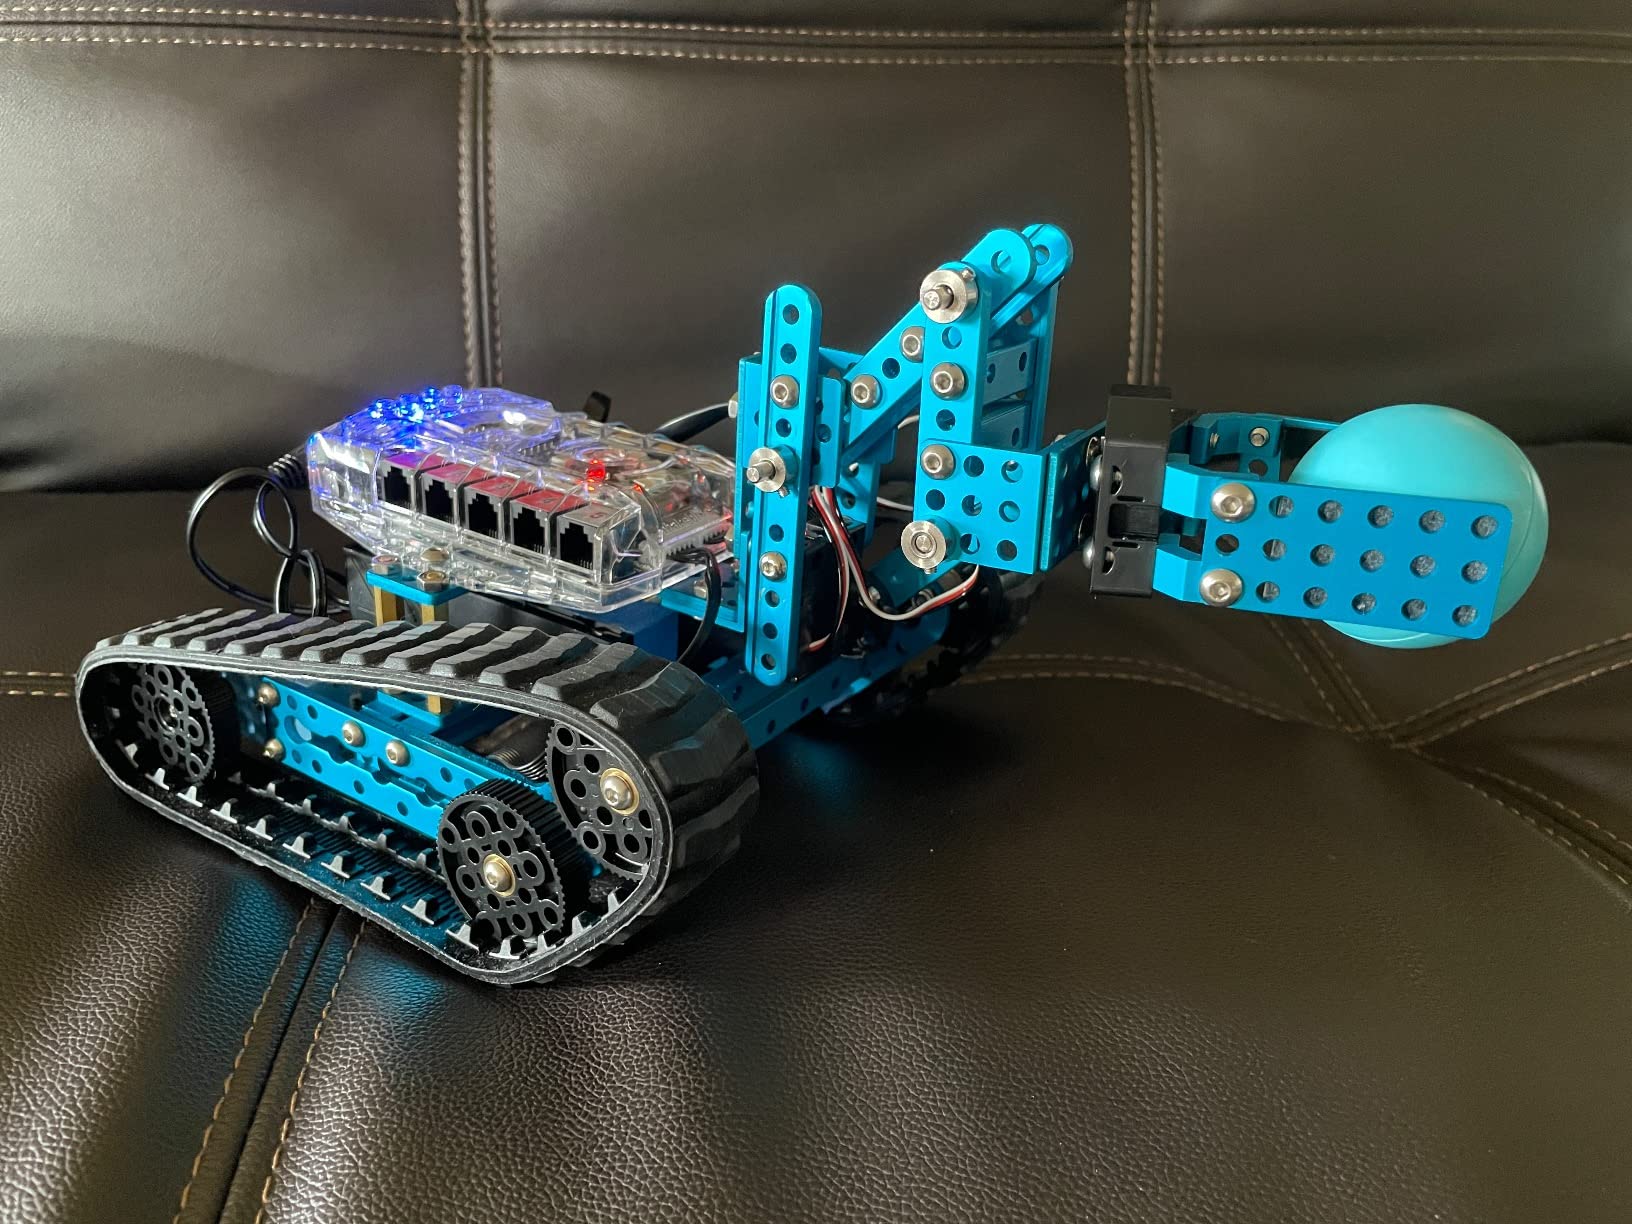
The all-terrain tracks on the Land Raider actually work. We tested it on carpet, grass, and a gravel driveway. It climbed small obstacles and maintained traction where wheeled robots struggled.
For outdoor robotics clubs or backyard engineering sessions, that capability opens up projects that indoor-only robots cannot attempt. The Nervous Bird self-balancing mode is also impressive, using the same gyroscopic principles found in real segways and drones. Battery life is the main weakness.
The Ranger uses six AA batteries, and they drain quickly during active programming sessions. We switched to rechargeable NiMH cells and the problem improved, but it is still a recurring cost and environmental consideration. Makeblock does not include batteries, so factor that into your initial setup budget.
Mechanical Versatility and Competition Potential
Three robot configurations in one box means kids do not outgrow the Ranger in a month. The mechanical differences between tracked, balanced, and wheeled designs teach genuine engineering concepts about stability, traction, and center of gravity. Parents on a budget get months of return from a single purchase.
The compatibility with LEGO parts also helps kids merge existing brick collections with their new robotics learning, which stretches creativity without stretching the wallet. The Me Auriga mainboard is the same controller used in higher-end Makeblock products, so skills learned here transfer upward.
Kids who master the Ranger can move to the Makeblock Ultimate or Maker Platform without learning a new programming environment. That vertical integration is rare in the robotics kit market, and it makes the Ranger a smart long-term investment for serious young engineers.
Software Compatibility and Assembly Complexity
Some families reported Bluetooth connection issues with newer Android devices, and firmware updates can be intimidating for beginners. We encountered one update that failed the first time because the timing was finicky. It worked on the second try, but the process required reading a forum thread rather than following the manual.
If your child is under ten, plan to supervise the software setup personally. Assembly is also more complex than the standard mBot. The Ranger took our testers about three hours for the first build, and the Nervous Bird configuration requires careful attention to wire routing.
The instructions are adequate, but younger kids will definitely need an adult partner for the first assembly. This is not a bad thing for learning, but it is a reality check for parents expecting a fifteen-minute build.
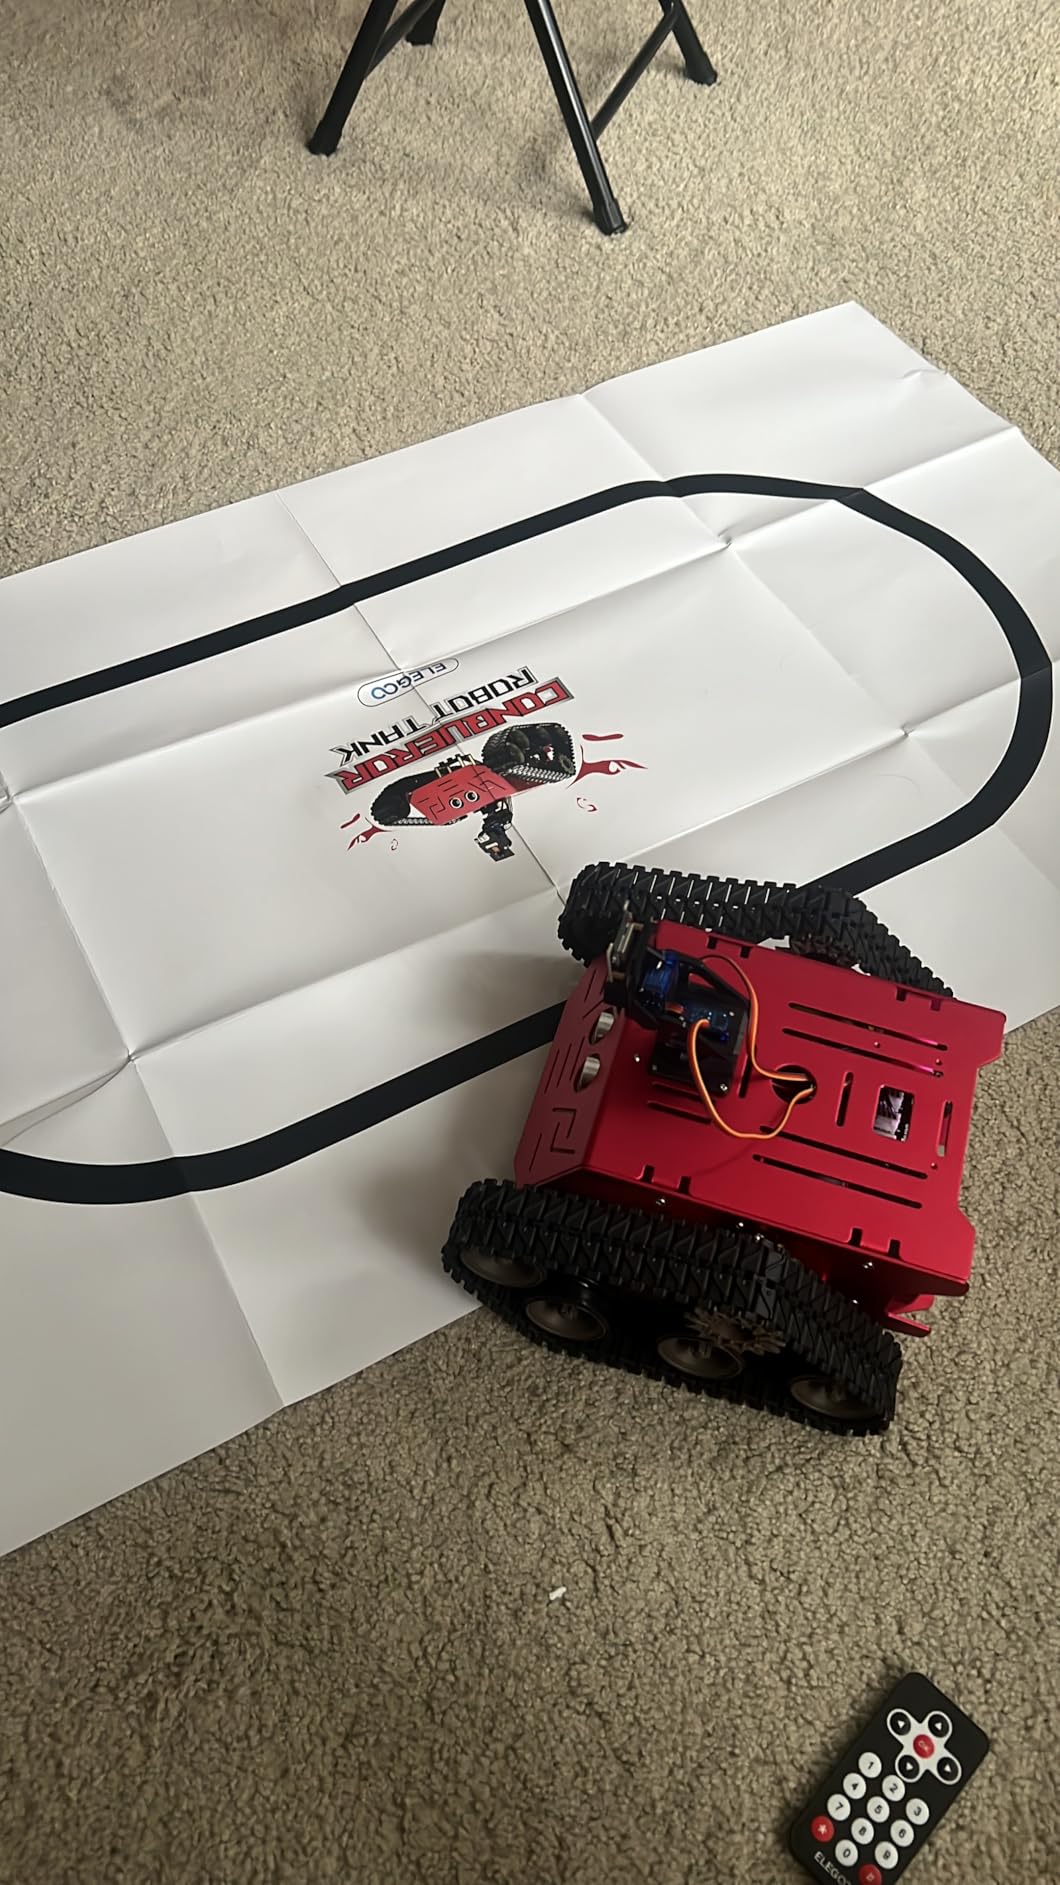
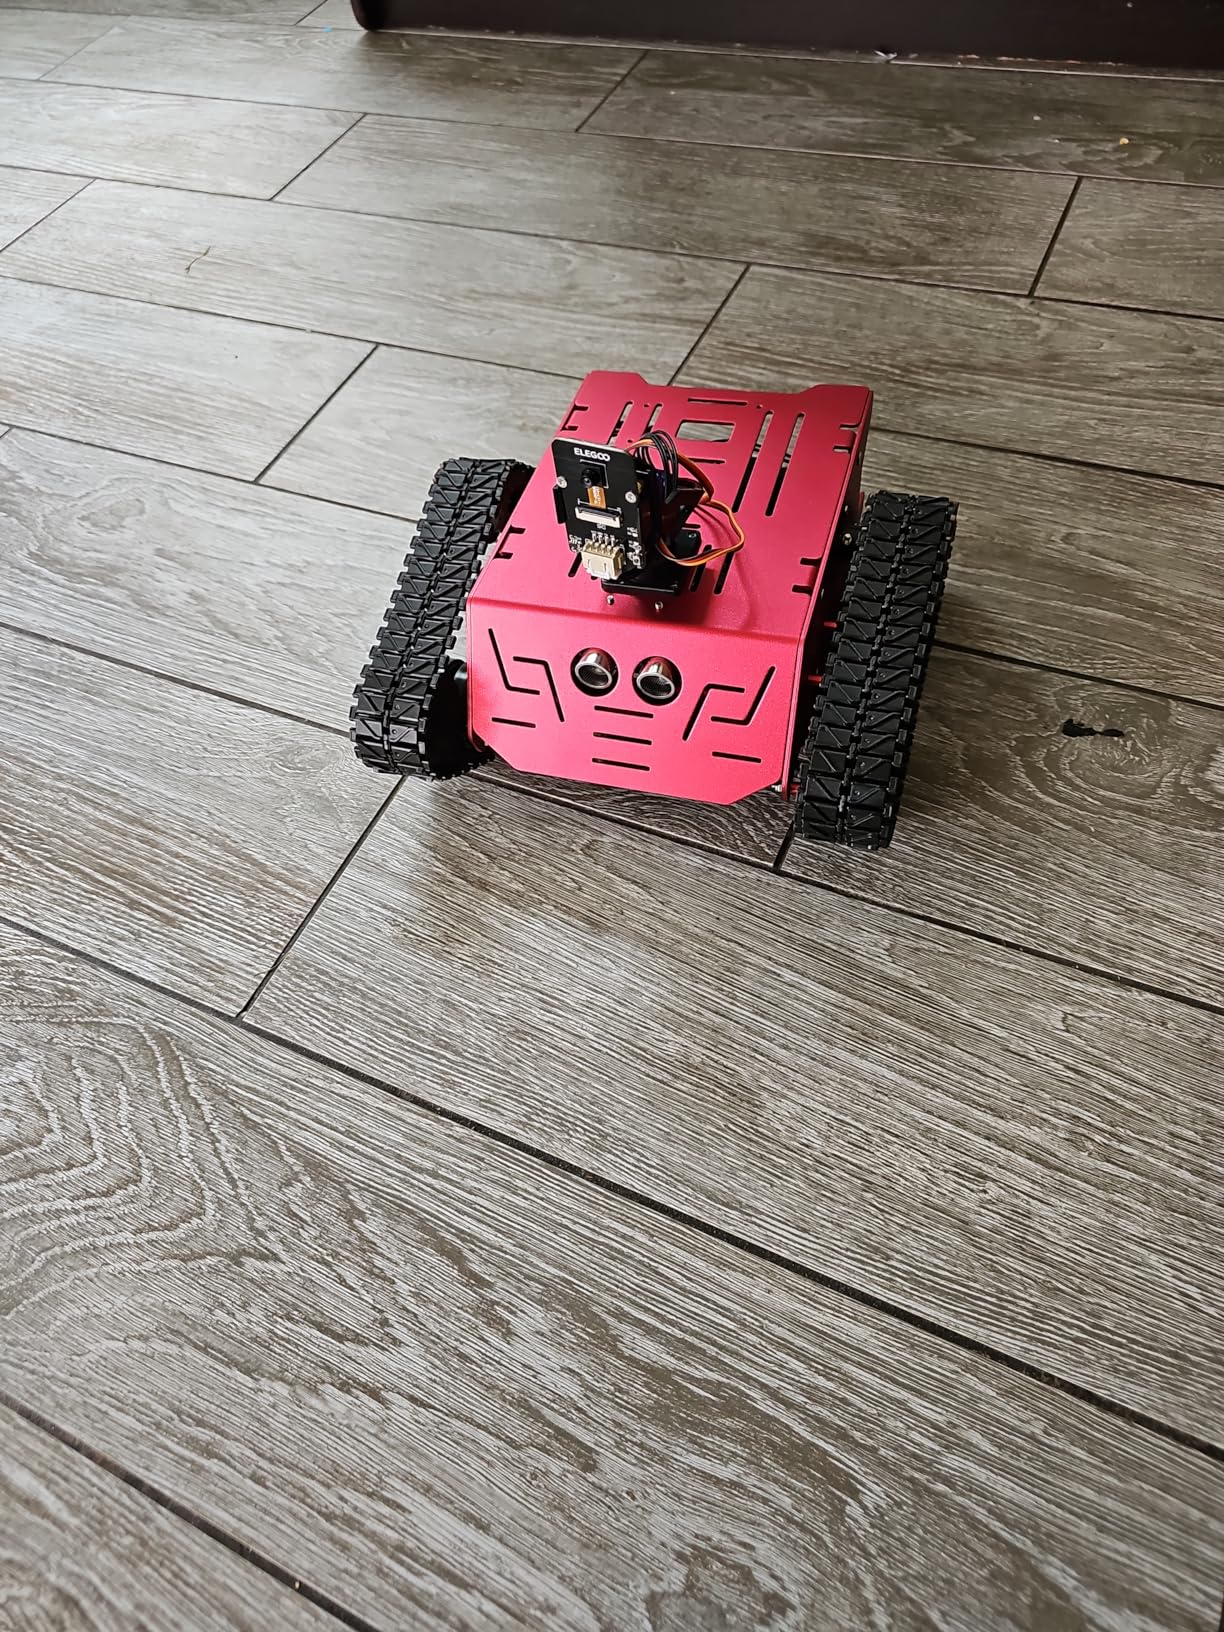
4. ELEGOO Conqueror Robot Tank – FPV Arduino Tank for Teens
- FPV first-person control
- Sturdy metal construction
- Good 30-40 minute battery
- Graphical programming for beginners
- IR blocked by metal frame
- WiFi connectivity issues
The ELEGOO Conqueror Robot Tank looks like something from a military tech show, and kids absolutely love that aesthetic. The stainless steel frame gives it a weight and presence that plastic robots cannot match. My thirteen-year-old neighbor built this in an afternoon and immediately started planning modifications, which is exactly the kind of engagement you want from an advanced STEM kit.
The first-person view camera is the headline feature. The two-degree-of-freedom gimbal lets the camera pan and tilt, and the WiFi app streams live video to a phone or tablet. Kids can drive the tank through another room while watching the camera feed, which creates a genuine telepresence experience.
We tested it by hiding a small object behind a couch and asking the builder to guide the tank and find it using only the camera. The task took eight minutes, and the kid called it the best science challenge he had done all year. The tank chassis handles rough terrain better than any car-style robot in our tests.
It climbed over pencil-thick cords, rolled across carpet transitions, and even managed small door thresholds. The tread design distributes weight well, and the motor torque is higher than the standard ELEGOO car. For outdoor robotics projects or obstacle courses, the Conqueror is the most capable option in its category.
Graphical programming support means beginners can start with drag-and-drop blocks before moving to Arduino C. The transition path is similar to the standard ELEGOO car, but the tank has more motors and sensors to control, which makes the programs more interesting. Our testers wrote a simple patrol loop that moved the tank forward, scanned with the ultrasonic sensor, and turned if an obstacle was detected.
Watching a heavy metal tank execute a kid-written program is genuinely satisfying. Build quality is solid, but the metal frame creates a real problem for the infrared remote. The IR receiver sits inside the chassis, and the steel plates block the signal from most angles.
We ended up using the app for almost all control, which worked fine but required a phone to be present. The line-following sensor also hangs low, so avoid thick carpet or uneven surfaces for that mode.
FPV Engagement and Real Engineering Skills
The first-person perspective transforms the robot from a toy into a tool. Kids start thinking about camera angles, field of view, and navigation strategy rather than just driving in circles. One of our parent testers, who is an electrical engineer, said the gimbal mechanism alone taught his son more about servo control than a textbook chapter.
The WiFi streaming is not cinema-quality, but it is more than clear enough for indoor robotics missions. The Arduino foundation means this tank is fully programmable with standard libraries. Kids can add GPS modules, extra cameras, or custom sensors using the same skills they learn with any Arduino board.
The open-source nature of the platform makes this a true educational investment rather than a closed toy with a limited shelf life.
Weight and WiFi Reliability for Younger Users
At over three pounds, the Conqueror is heavy enough to damage small objects if it drives off a table. Parents of younger children should set clear boundaries about where the tank can operate. The weight also means it hits harder during collisions, so delicate furniture and small pets should be considered when choosing a play area.
WiFi connectivity was inconsistent across our test environments. In one home with a crowded wireless network, the video stream dropped every few minutes. In another home with a simpler router setup, it worked flawlessly.
The tank creates its own WiFi network, so it does not need your home internet, but local interference from other devices can still cause hiccups. If your household has dozens of smart devices, test the connection during a low-traffic time of day.
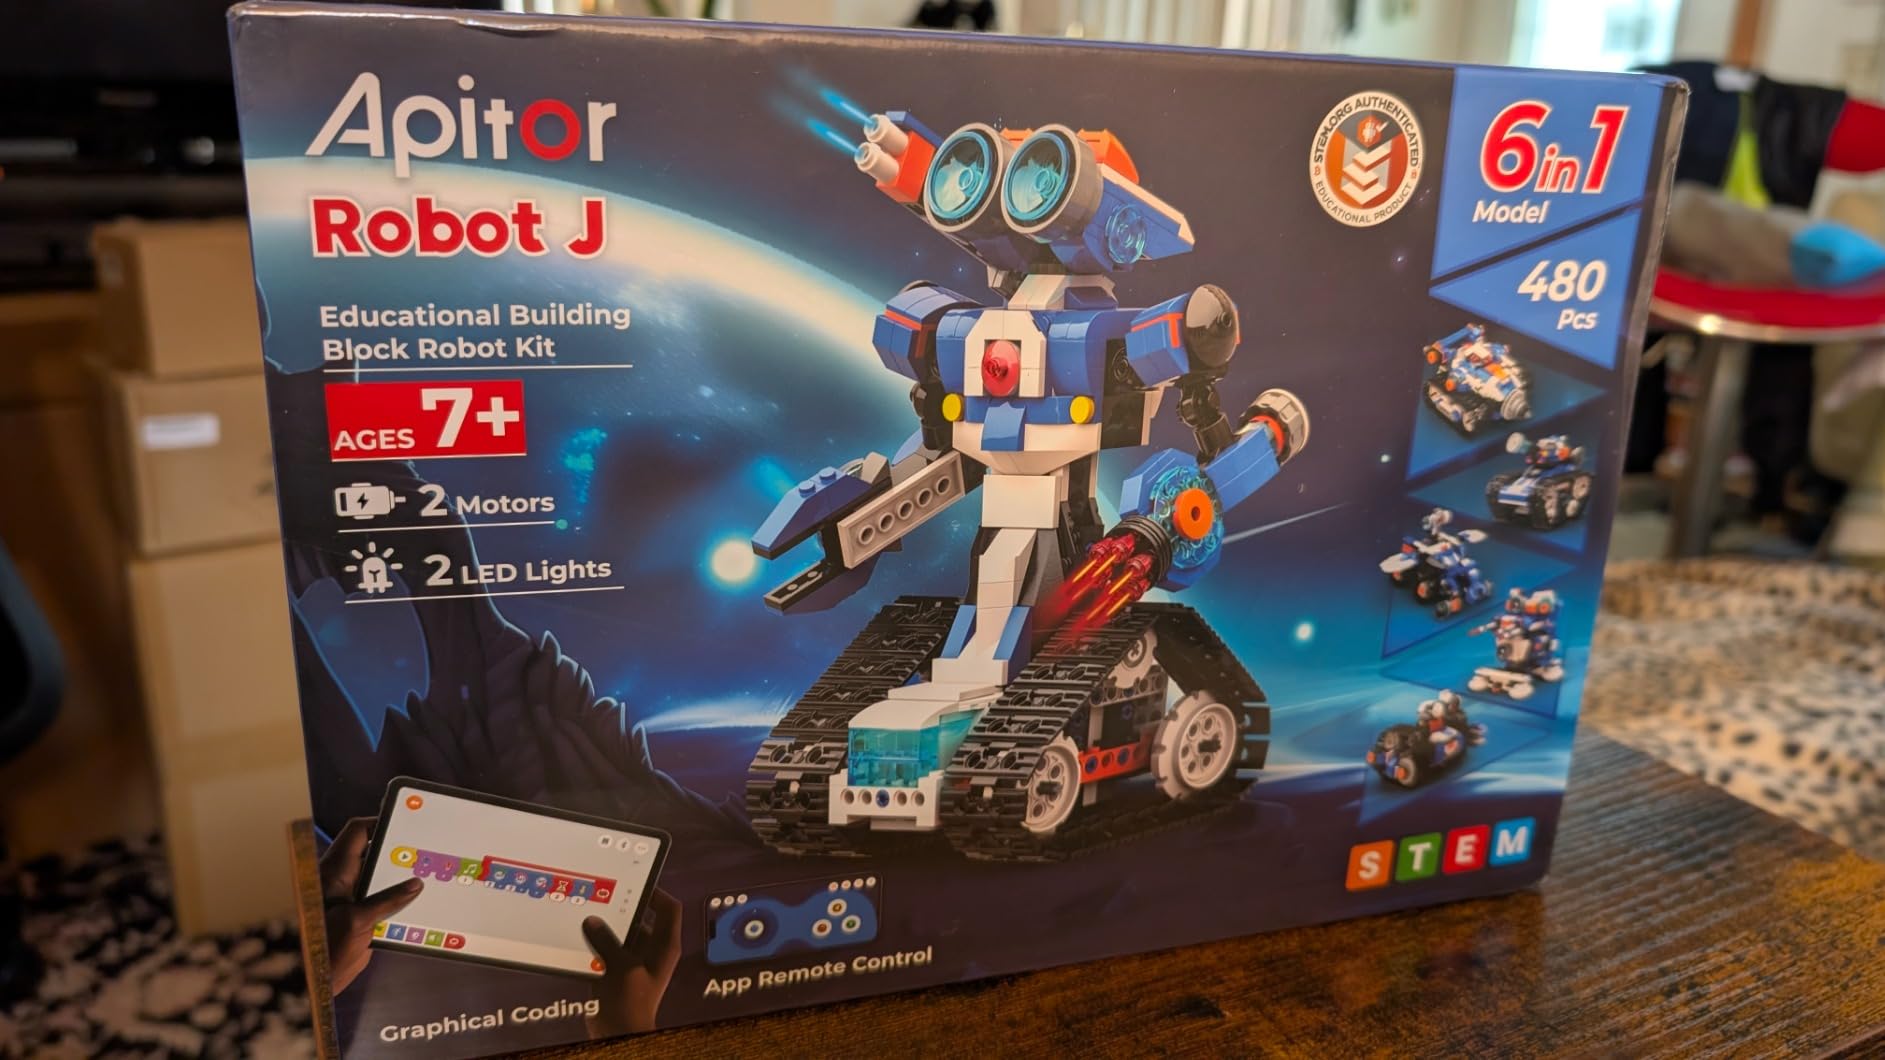
5. Apitor STEM Robot Toy – 6-in-1 App-Controlled Coding Kit
- Six robot configurations
- Tool-free assembly with ABS blocks
- Icon-based coding app
- Four smart control modes
- Missing pieces reported
- Requires separate tablet or phone
The Apitor STEM Robot Toy surprised me. At first glance, it looks like a standard block-based building kit, but the control module and coding app add genuine robotics depth. With 480 ABS blocks and six official robot designs, kids get variety without the complexity of soldering or wire stripping.
My nine-year-old niece built the exploration vehicle and controlled it through the app within an hour of opening the box. No tools are required for assembly. The blocks snap together with satisfying clicks, and the control module integrates two motors plus LED lights directly into the build.
That integration is cleaner than kits where wires dangle everywhere. The finished robots look polished rather than hacked-together, which matters for kids who care about how their creations look on a shelf or in a social media photo. The app uses icon-based coding, which is a step above simple remote control but a step below text-based programming.
Kids drag commands into sequences and watch the robot execute them. The four control modes include dual-motor drive, single-motor precision, gyro steering, and path drawing. Each mode teaches a different control concept, so the kit grows with the child as they master each interface.
Bluetooth connectivity is stable within about fifteen feet. We tested it in a living room with walls and furniture, and the connection held reliably as long as the tablet stayed in the same room. The response time is quick enough for real-time driving, and there is no perceptible lag during normal play.
Battery life is decent for a block toy, running about ninety minutes on three AA cells. The primary weakness is quality control. A few online reviewers reported missing pieces in their sets, which is frustrating when a child is halfway through a build.
We did not experience this with our test unit, but the reports are consistent enough to mention. Apitor does offer replacement parts, but the delay can kill a weekend project.
Visual Coding and Immediate Play Value
The icon-based coding interface is ideal for kids who have outgrown simple remote cars but are not ready for Python or Arduino. The visual commands map cleanly to real logic structures like loops, conditionals, and variables. When my niece programmed a light sequence followed by a forward movement, she was essentially writing a function without knowing the terminology.
That foundation makes the eventual jump to text-based languages much less intimidating. The six robot designs range from simple to moderately complex, which gives kids a natural difficulty curve. They can start with the basic rover and progress to the walking robot or grabber arm.
Each build uses different mechanical principles, so the educational value extends beyond just coding. Gears, levers, and structural support all come into play, which makes this a well-rounded engineering experience.
Device Dependency and Printed Instructions
The Apitor requires a phone or tablet for both coding and accessing four of the six build instructions. Only one model has printed instructions in the box, which means kids without regular device access will struggle. This is a significant limitation for families with strict screen-time rules or households where tablets are shared among siblings.
Plan to have a dedicated device available during build sessions. The printed instructions for the single included model are clear, but the app-based instructions are harder to follow while building. The screen is small for a parts list, and switching between the build view and the parts view is tedious.
We found it easiest to build near a larger tablet or cast the phone to a TV, which is an extra step that parents should know about before purchasing.
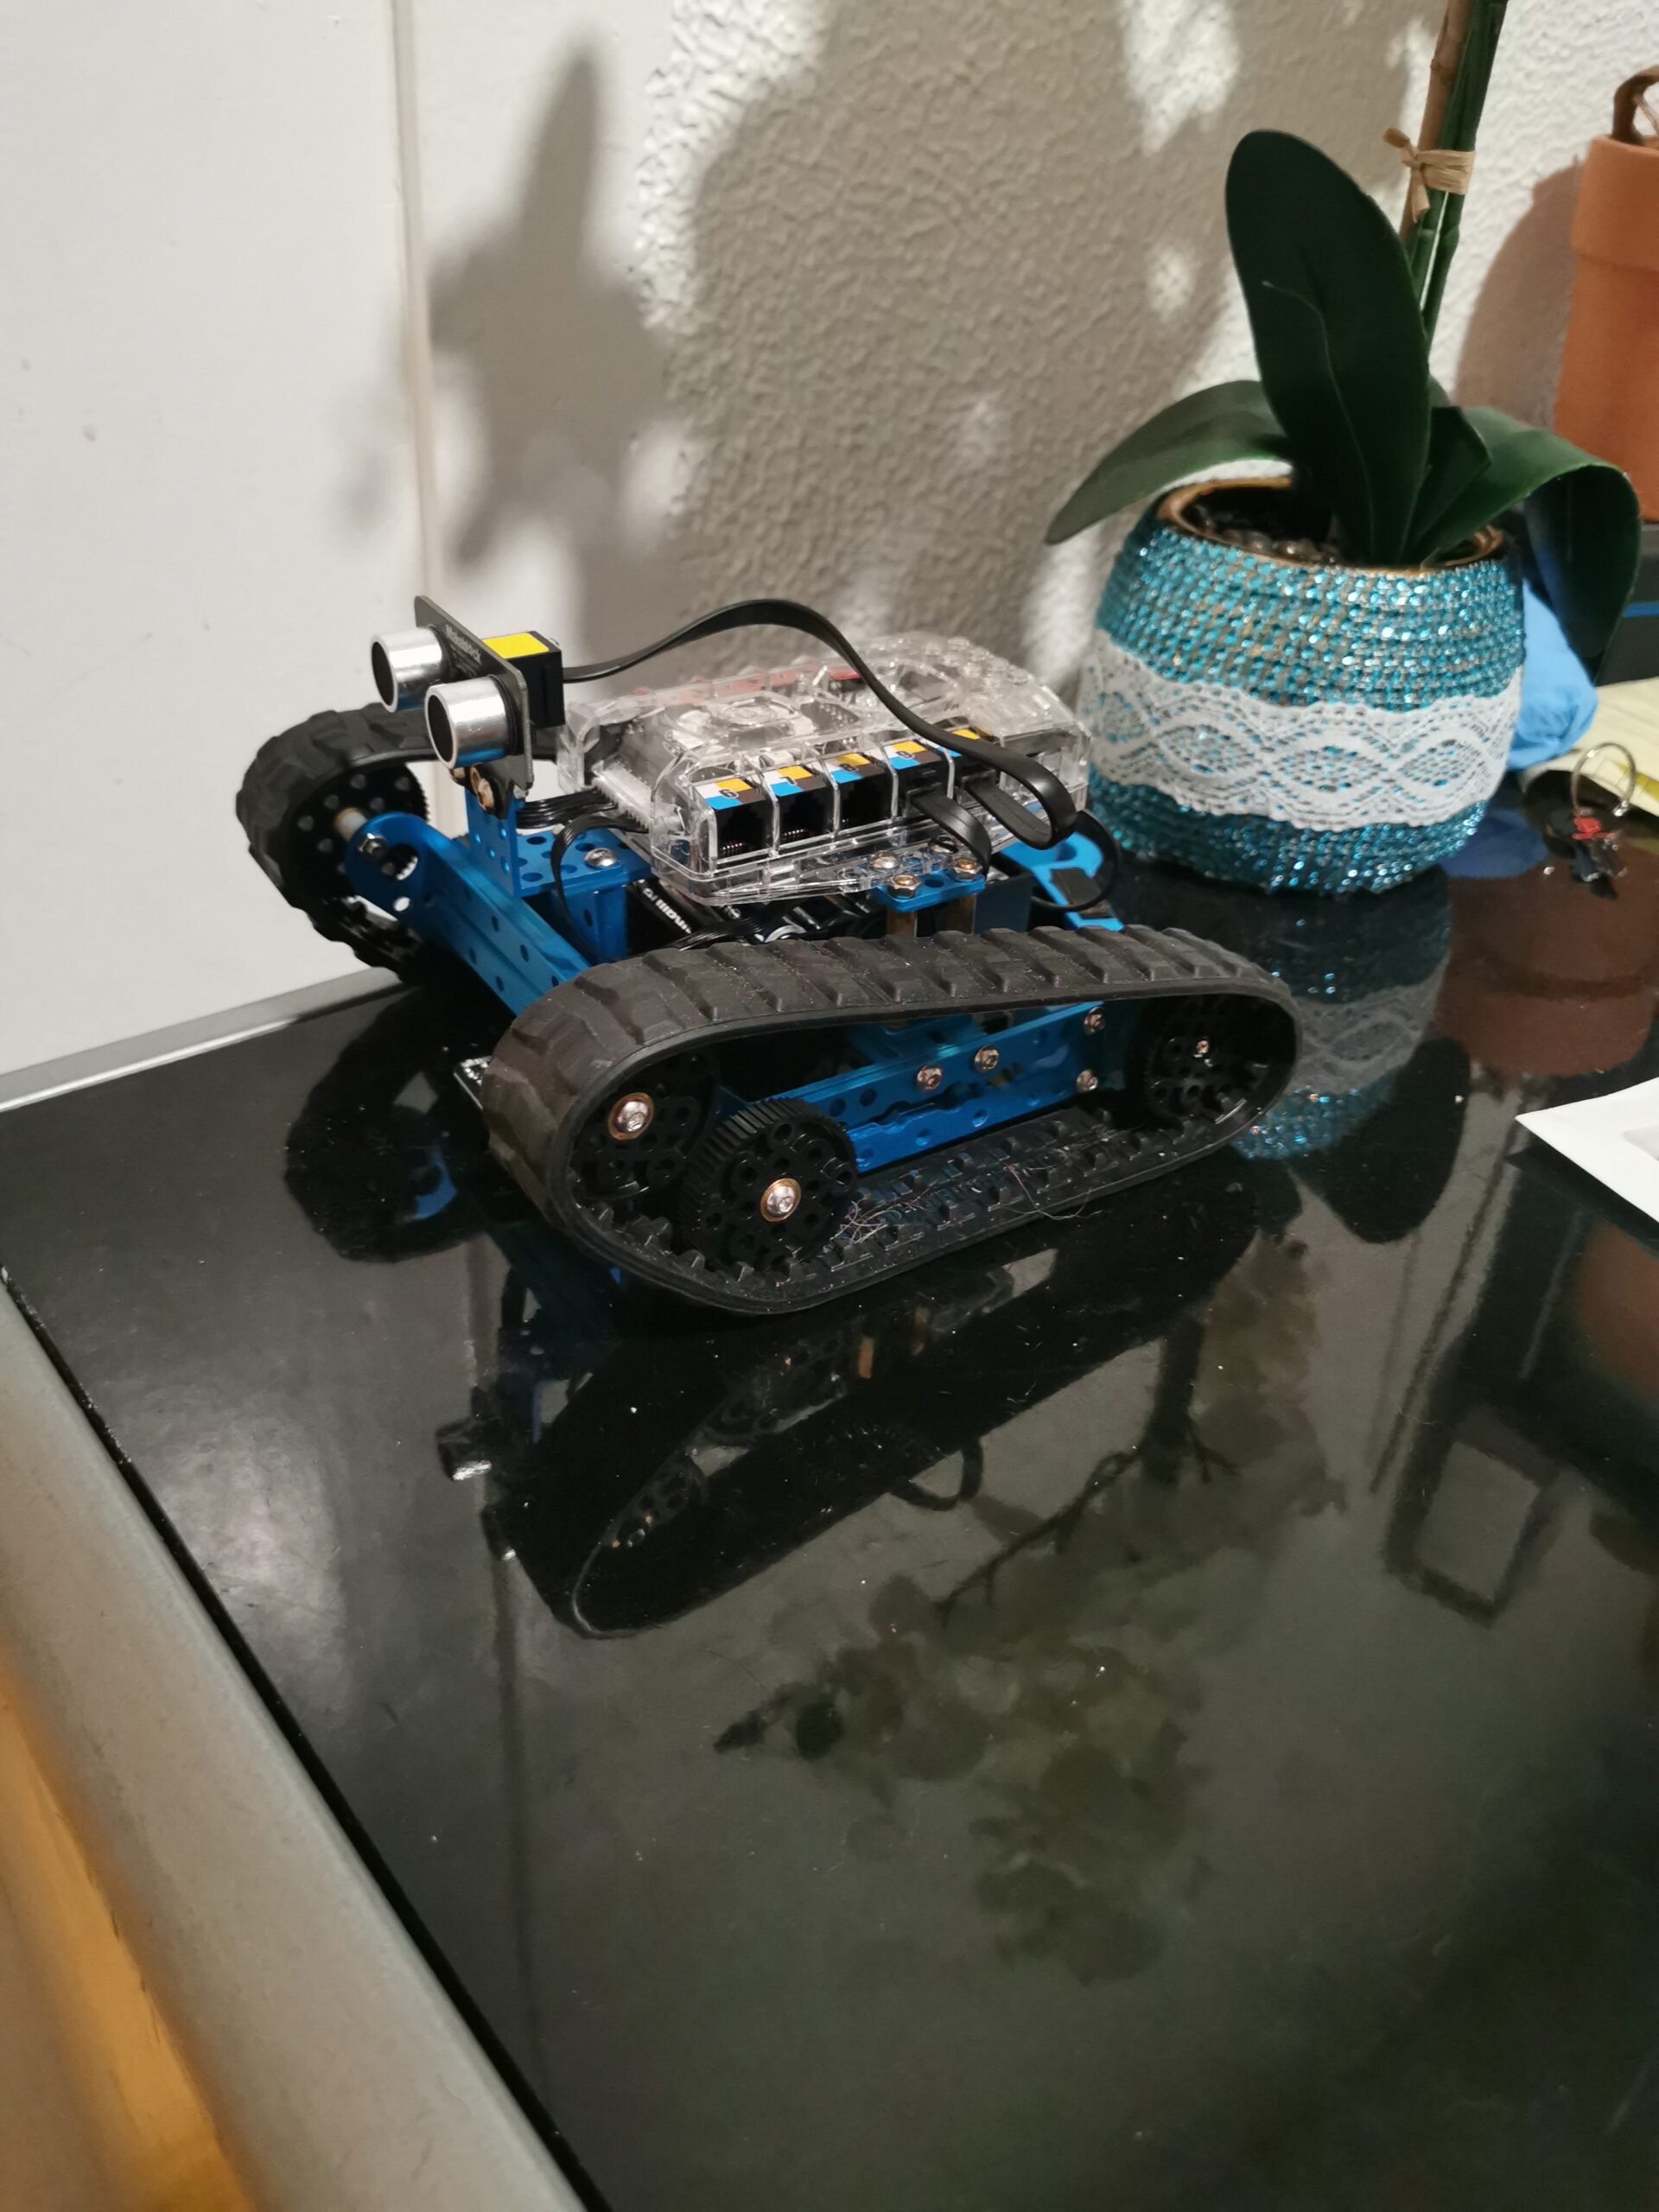
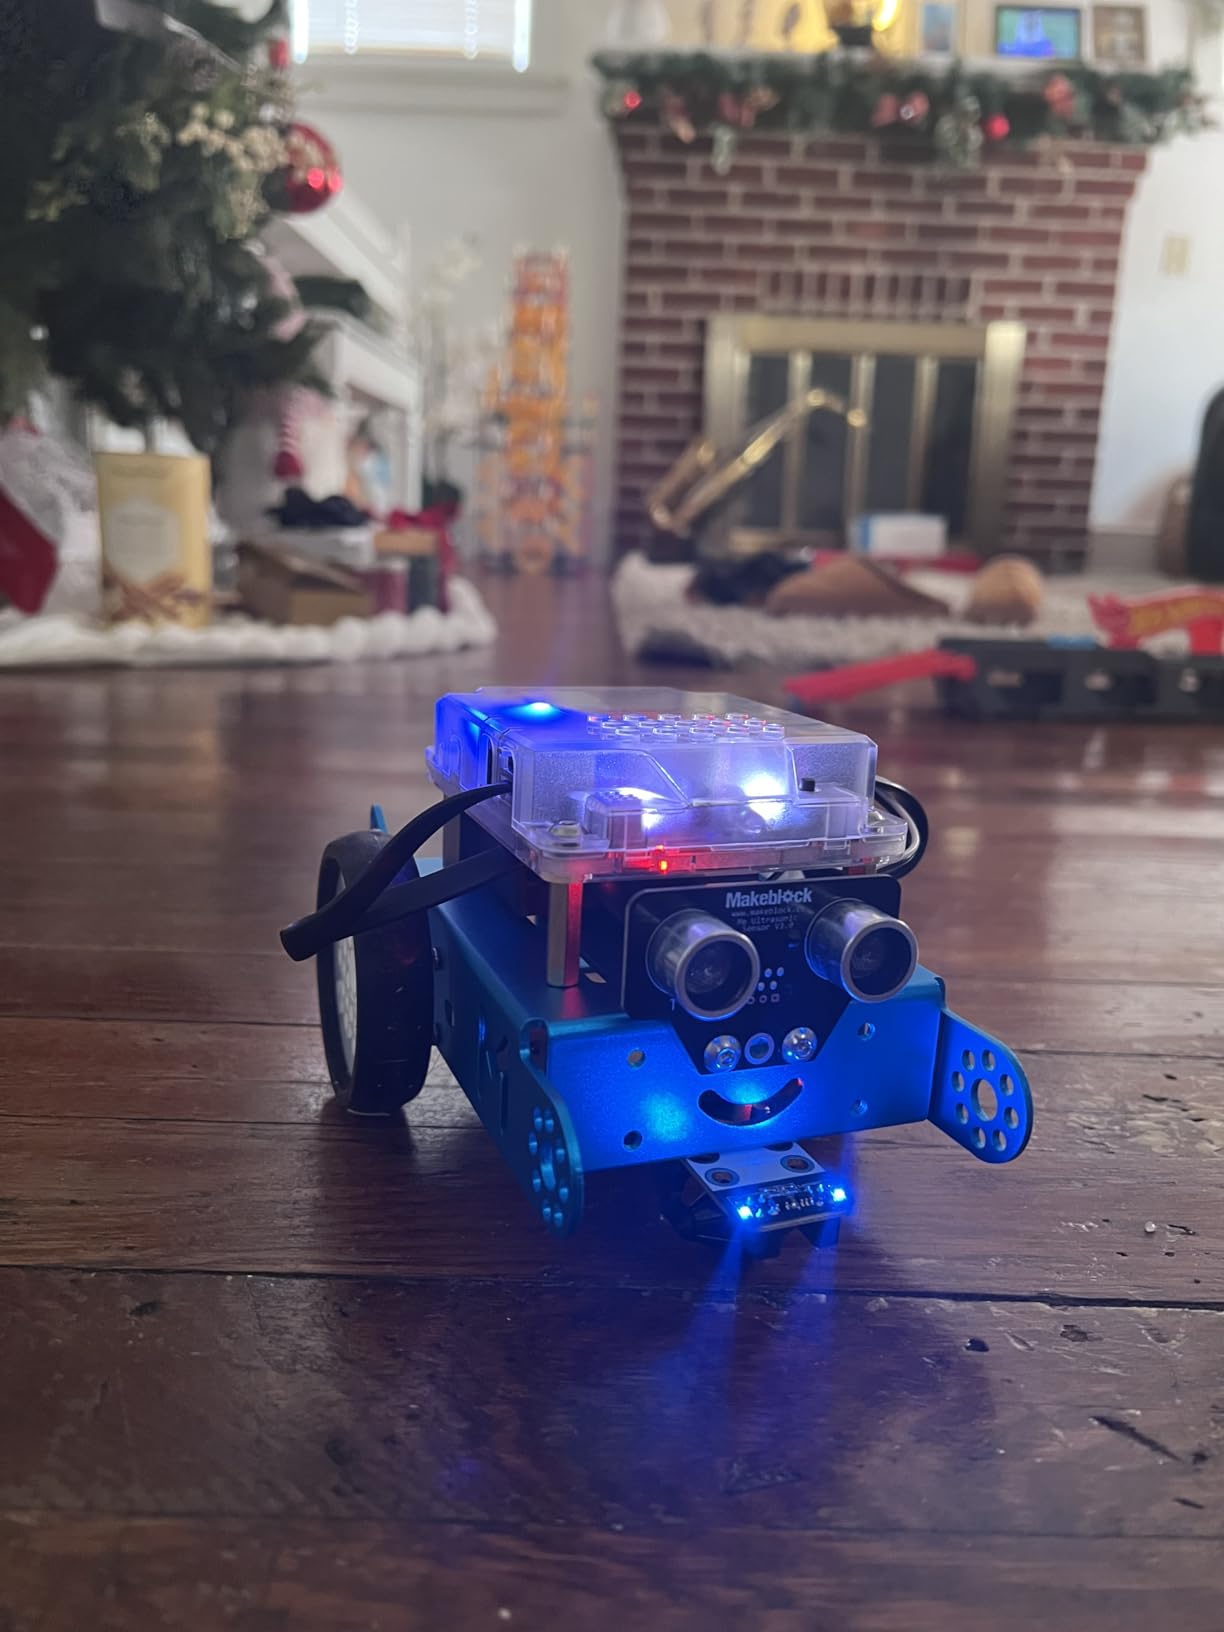
6. Makeblock mBot – Classic Scratch and Arduino Learning Robot
- Quick 15-minute assembly
- Sturdy metal chassis
- Rich programming tutorials
- Compatible with LEGO parts
- Batteries not included
- Bluetooth reconnection issues
The Makeblock mBot is the classic entry point into advanced robotics, and it has earned that reputation over years of classroom use. The metal chassis is a small but meaningful upgrade from plastic competitors, and the build is genuinely doable in fifteen minutes. My son assembled his first mBot without help when he was ten, which gave him confidence that carried into more complex projects later.
The mBlock software is the same platform used by the more expensive Ranger, so kids can start here and move up without relearning anything. Scratch-style blocks control the motors, LEDs, and buzzer, while a code view shows the Arduino C underneath. That dual view is a powerful teaching tool.
Kids can modify a block program, see the code change, and start to understand the relationship between visual and text-based programming. Line-following and obstacle avoidance work out of the box with the included sample programs. The ultrasonic sensor is mounted on a small servo that scans left and right, which makes the robot look actively curious rather than just reactive.
Kids love watching the head turn, and it opens conversations about how real robots map their surroundings. The infrared remote adds immediate play value for younger siblings who are not ready to code yet. Compatibility with LEGO bricks is a hidden advantage.
The mounting holes match standard LEGO spacing, so kids can add decorative shells, cargo beds, or even simple arms using bricks they already own. We built a small LEGO crate on top of our mBot and programmed it to deliver a note across the kitchen. That kind of creative play is exactly what keeps kids engaged with STEM over time.
The online community around mBot is extensive. Makeblock hosts project galleries, tutorial videos, and forums where kids share modifications. That social layer matters more than most parents realize.
When children see other kids building cooler versions of the same robot, they get motivated to push their own skills further. Our team found at least forty community projects that extended the mBot with new sensors or behaviors.
Fast Build and Strong Curriculum Support
The fifteen-minute build time is not a marketing exaggeration. The instructions are clear, the parts are pre-labeled, and the chassis comes partially assembled. Kids get to the coding phase quickly, which is important for maintaining attention spans.
In a classroom setting, that speed means less time troubleshooting builds and more time learning programming concepts. The tutorial library is better than most competitors. Makeblock provides structured lessons that progress from basic movement to sensor integration to autonomous behavior.
Teachers can follow the sequence without designing their own curriculum, and parents can use the same lessons for homeschool enrichment. The alignment with real computer science standards is a bonus that educators specifically appreciate.
Battery Logistics and Bluetooth Quirks
The mBot requires four AA batteries and a separate CR2025 coin cell for the remote. Neither is included, which is an annoying extra step on delivery day. Rechargeable AAs are the best long-term solution, but they add to the upfront cost.
The battery compartment is easy to access, so swapping cells is not a chore, but it is a recurring one. Bluetooth pairing works reliably on iOS and most Android devices, but we saw reports of connection drops on older Kindle tablets. The workaround is to use the USB cable for programming and Bluetooth only for remote driving.
That is acceptable for most families, but worth knowing if your child plans to use a specific device. Always test the app compatibility before the first build session.
7. ButterflyEdufields 40in1 – Most Projects in One STEM Kit
- Massive variety of 40 projects
- Multiple sensors included
- No soldering required
- Detailed concept manuals
- Instructions can be unclear
- Component attachment is tricky
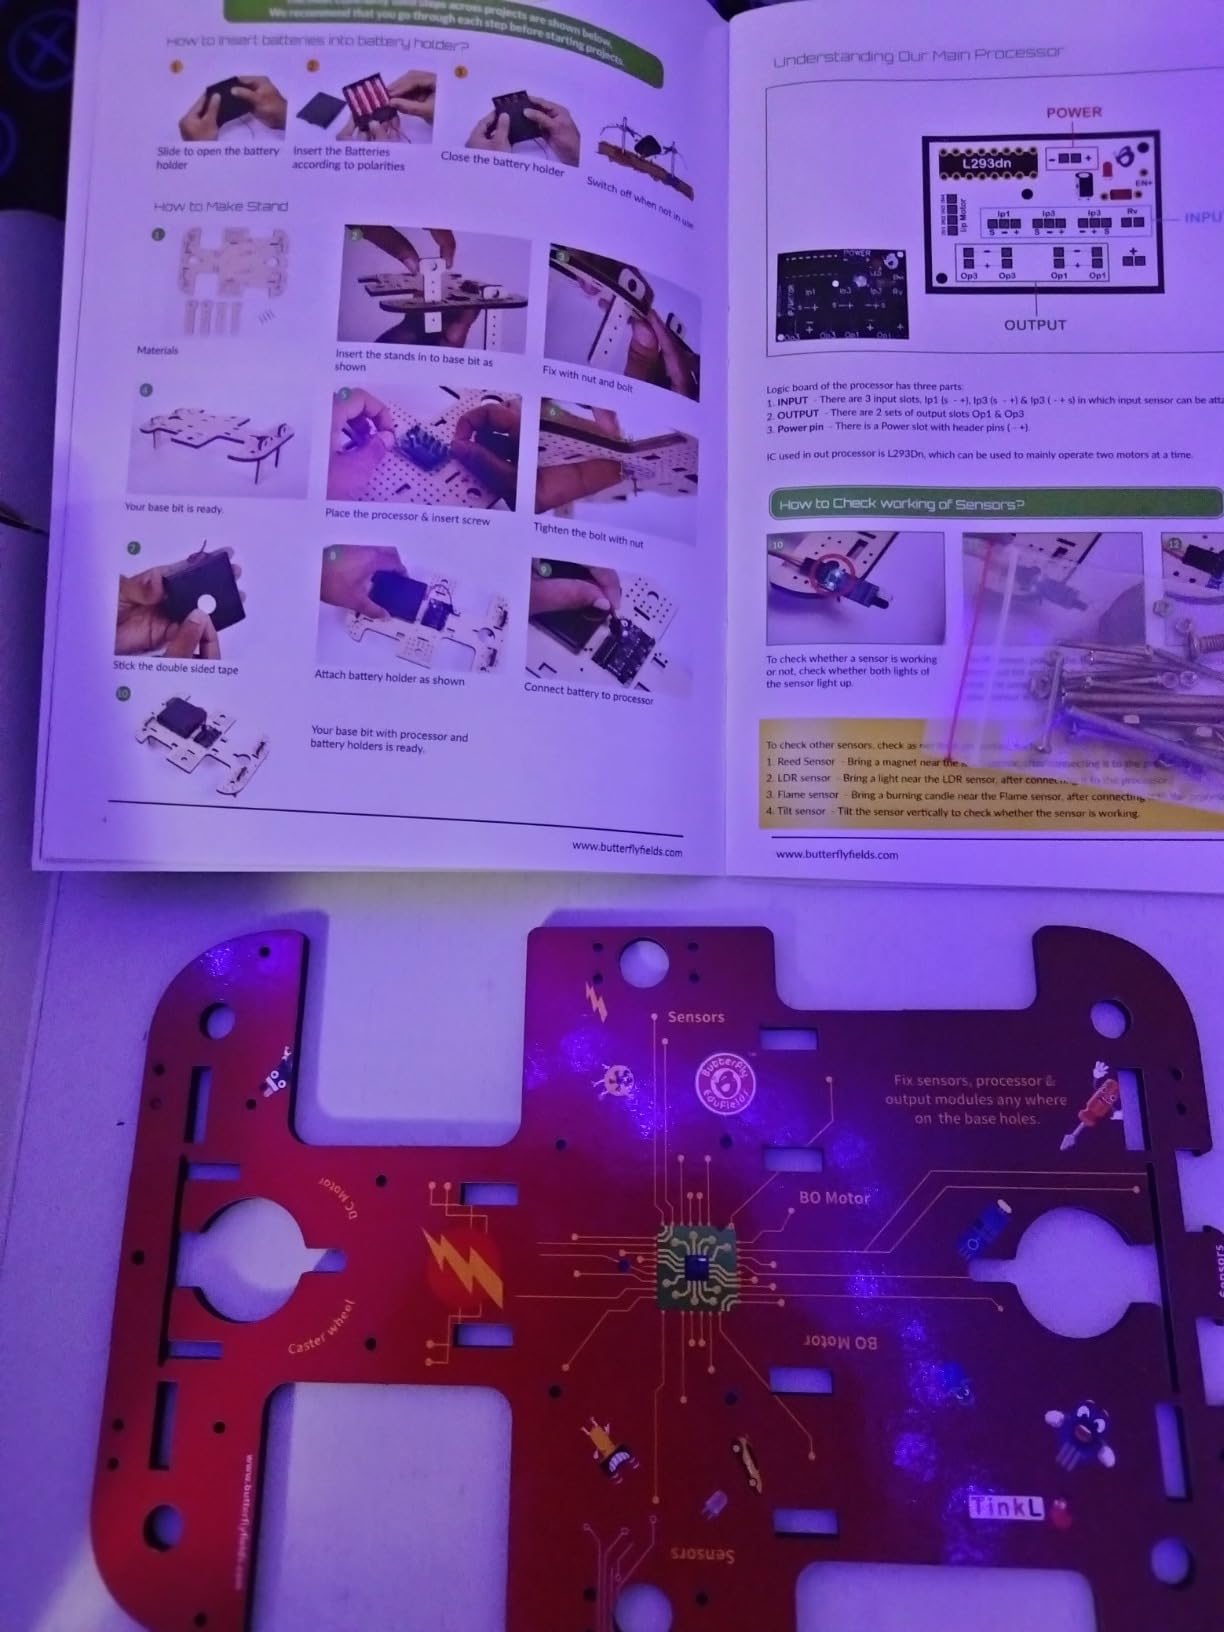
The ButterflyEdufields 40in1 kit is a project factory. With over forty distinct builds and more than one hundred components, it is the most versatile kit we tested. My daughter spent an entire summer working through the projects, and she still had half the kit left unexplored when school started.
For parents who want maximum educational mileage from a single purchase, this is the strongest candidate. The projects range from simple circuits like a doorbell to complex robots like a line-following car and a flame extinguisher. Each build uses a combination of sensors, motors, and switches on a reusable base board.
No soldering is required, which keeps the kit safe for younger advanced learners while still teaching real electronics principles. The IR sensor, flame sensor, touch sensor, and light-dependent resistor all introduce genuine sensor technology without intimidating assembly. I particularly liked the concept manuals that explain why each project works, not just how to build it.
When my daughter built the hand water dispenser, the manual explained capacitive sensing in language an eleven-year-old could understand. That context transforms the activity from a craft project into a science lesson. Parents who want to answer “why” questions without scrambling for Google will appreciate the included explanations.
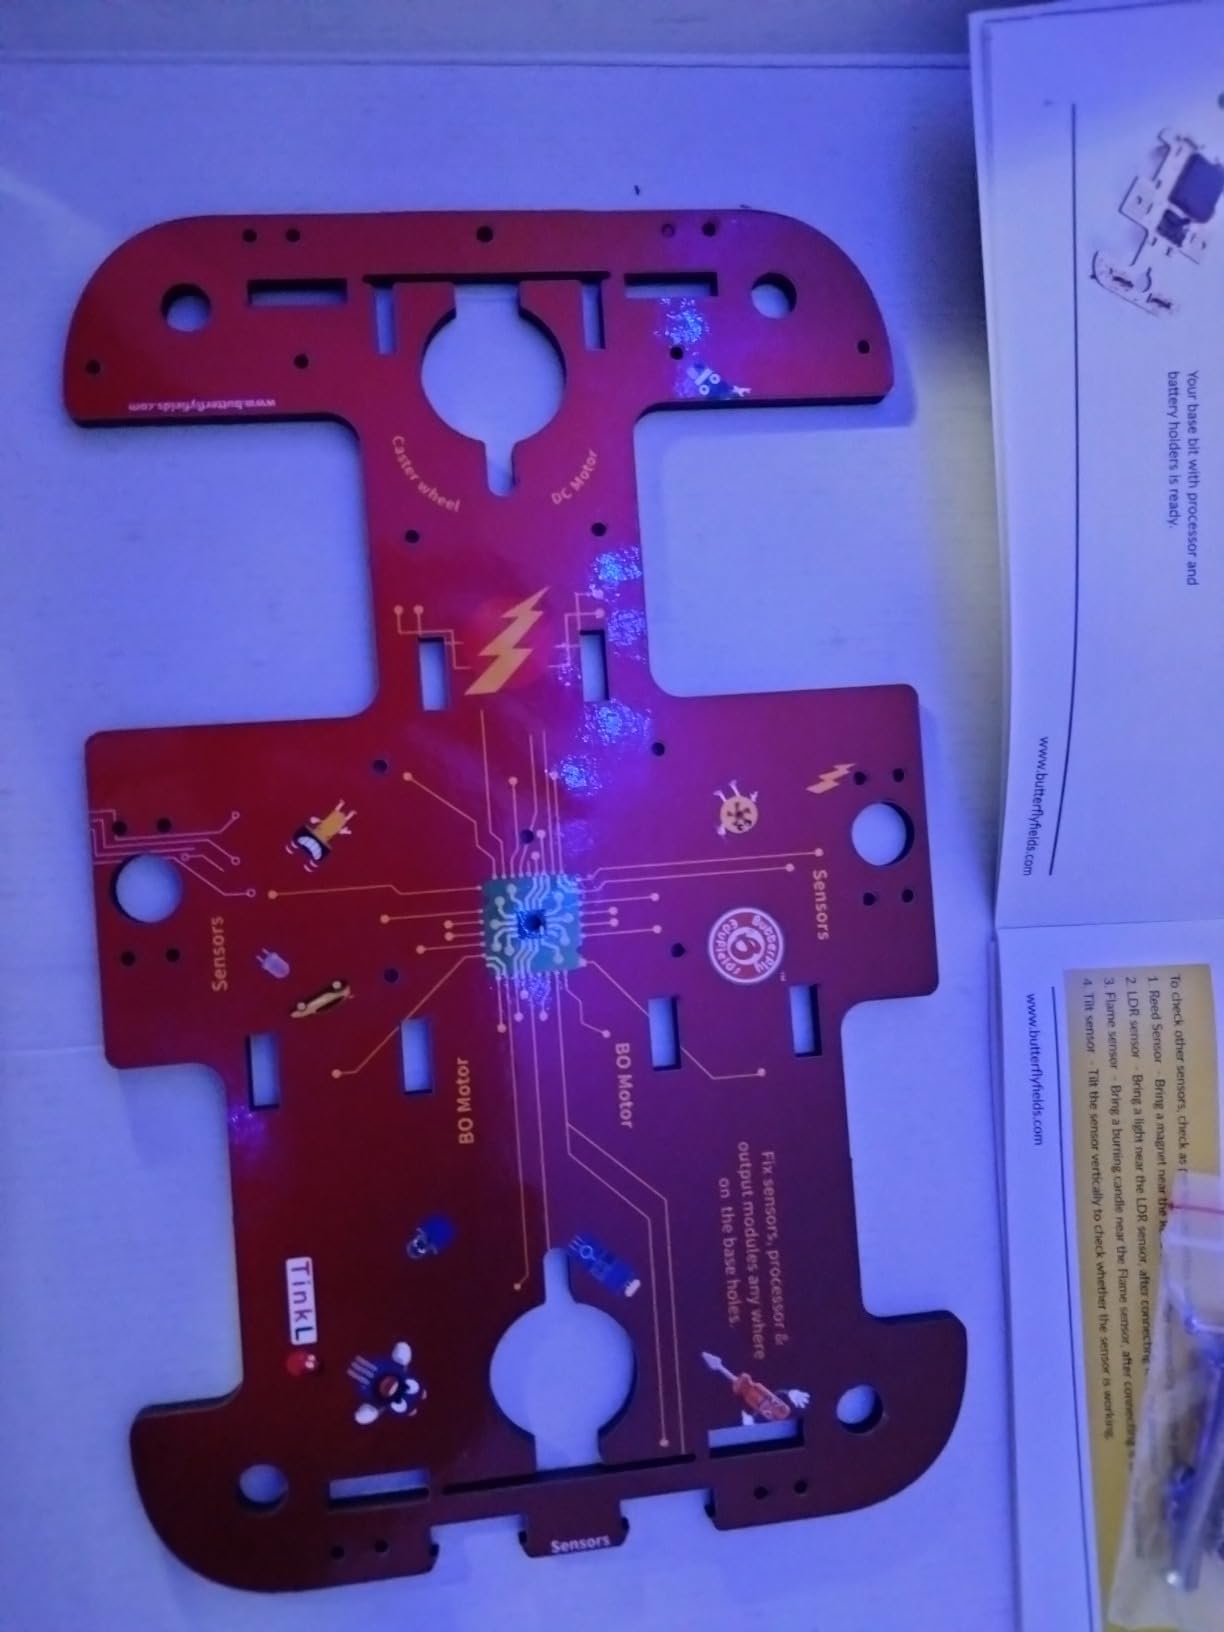
The wood base board is a nice tactile alternative to plastic breadboards. Components attach with screws, which gives a satisfying mechanical connection and teaches basic fastening skills. The board is compact enough for kitchen table use, and cleanup is easy because everything stays in place.
We kept the kit in a small shoebox between sessions, and it traveled to a cousin’s house without losing parts. The main frustration is instruction clarity. Some steps are out of order, and a few diagrams show components from angles that make orientation confusing.
My daughter needed help with three of the forty projects, which is not a dealbreaker but is higher than the ELEGOO or Makeblock kits. Younger kids will definitely need an adult co-builder for the more complex robots.
Project Depth and Screen-Free Learning
Forty projects is an enormous number for a single kit. Even dedicated kids will take months to exhaust the possibilities, and the variety prevents the boredom that sets in with single-function robots. The progression from simple circuits to autonomous robots also mirrors how real engineering education works.
Kids build confidence with basic wiring before tackling sensor fusion and motor control. The screen-free nature is another strong selling point. No tablets, no apps, and no Bluetooth pairing.
Kids read physical instructions, manipulate real components, and see immediate results when a switch closes or a motor runs. For parents worried about screen addiction, this kit offers rich STEM engagement without adding more digital time to the day.
Instruction Quality and Younger Builder Support
The instruction issues are real enough that I recommend parents do a quick preview of each project before handing it to a child. The component attachment with screws is also more finicky than plug-and-play ports. Small hands struggle to align screws with holes while holding a sensor in place.
We solved this by using a small magnetic screwdriver from a eyeglass repair kit, which made the process much smoother. Some reviewers reported quality inconsistencies, including worn parts or missing screws. Our test unit was complete, but the reports suggest that quality control is not as tight as with major brands like Makeblock or ELEGOO.
Order with enough time to request replacements if needed, and check the parts list against the box contents on the first day.
8. Teach Tech Hydrobot Arm – Water-Powered Mechanical Engineering
- Teaches real hydraulic principles
- No batteries needed
- High-quality precision parts
- Six axes of movement
- Complex assembly requires help
- Time-consuming build
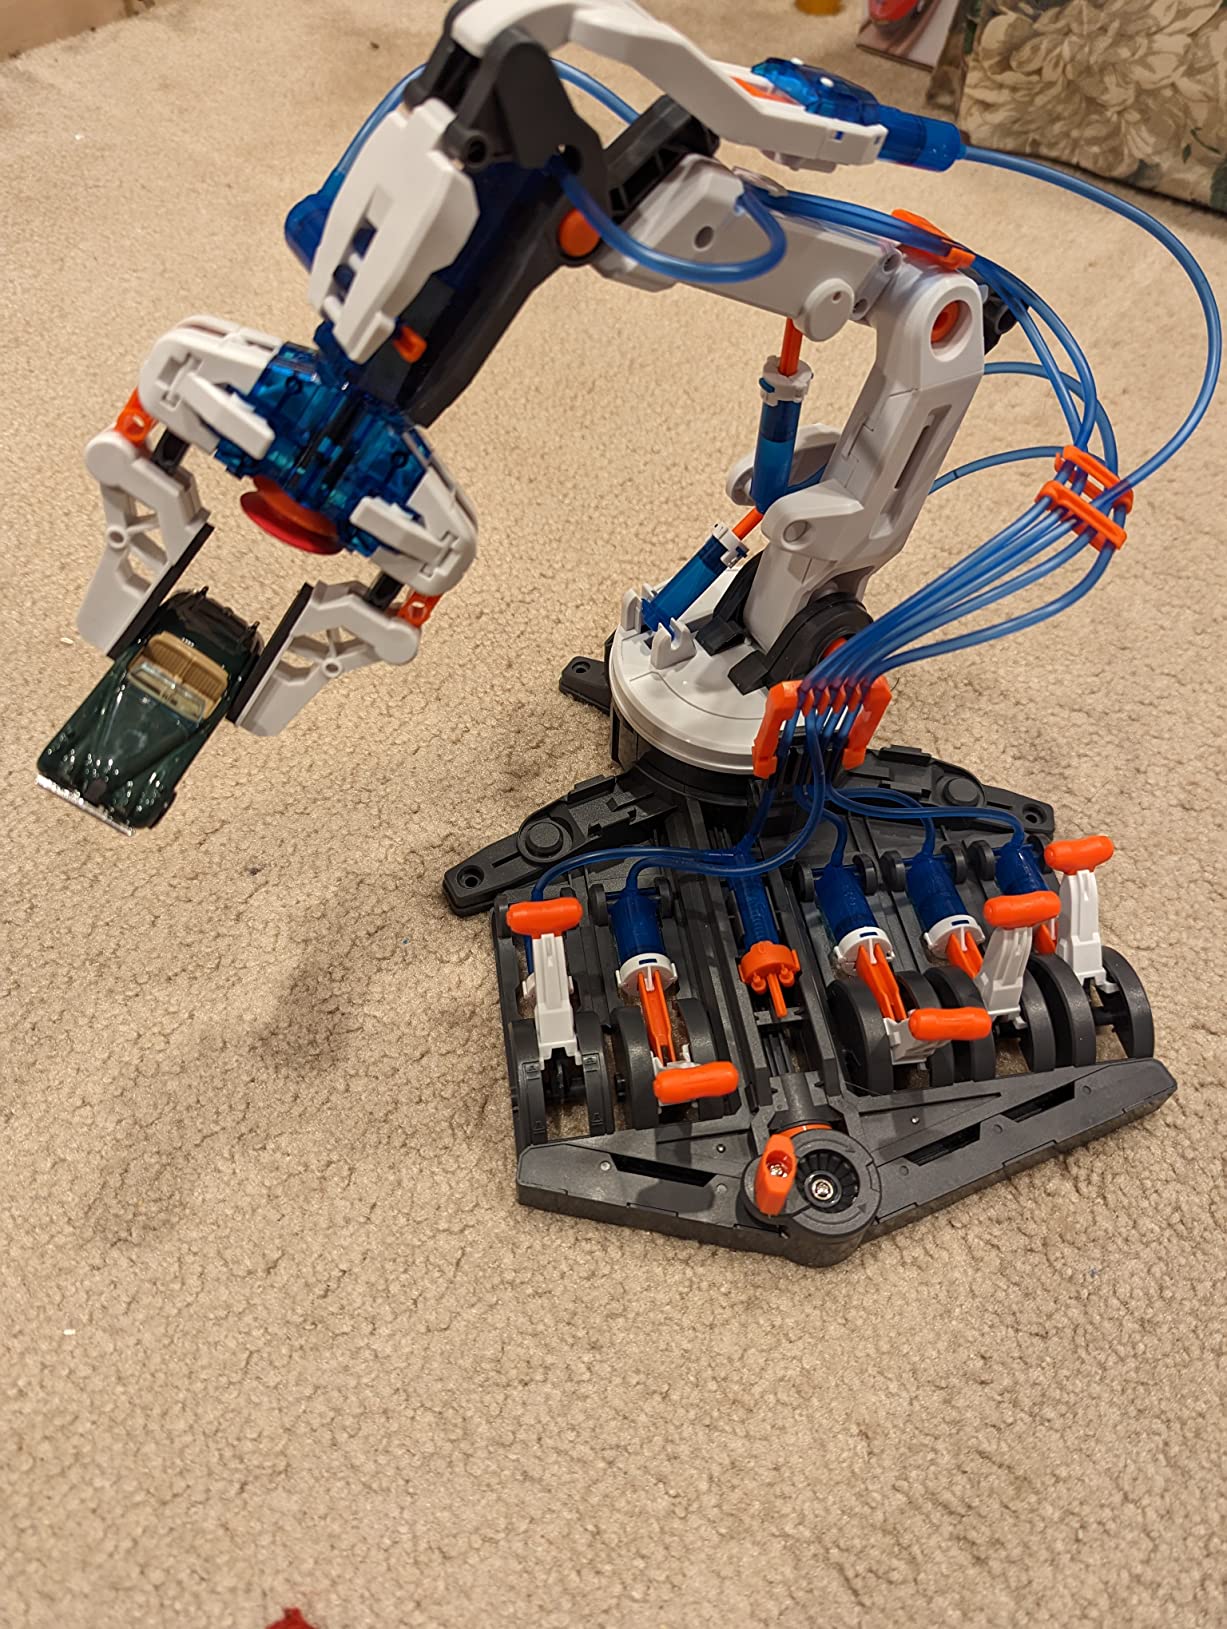
The Teach Tech Hydrobot Arm is the only kit in our roundup that uses water power instead of electricity. That difference makes it a fascinating introduction to mechanical engineering and fluid dynamics. My son built this over a Saturday, and the finished arm actually picks up small objects using water pressure in syringes connected by plastic tubing.
It is the kind of hands-on physics lesson that textbooks cannot replicate. The arm has six axes of movement, including base rotation, shoulder elevation, elbow bend, wrist rotation, and a two-finger gripper. The gripper can be swapped for a suction cup attachment, which adds variety to the challenges kids can attempt.
We set up a simple assembly line on the dining table where the arm moved a ping-pong ball from one cup to another. The task took three tries to get the hydraulic pressure right, and the problem-solving process was more educational than any pre-programmed robot mission. No batteries are required, which is both an environmental benefit and a logistical relief.
The arm works anywhere you have water and a flat surface. That portability makes it ideal for travel, camping, or visits to grandparents where electronic toys might not have charging access. The quiet operation is also a nice contrast to buzzing motors and beeping sensors.
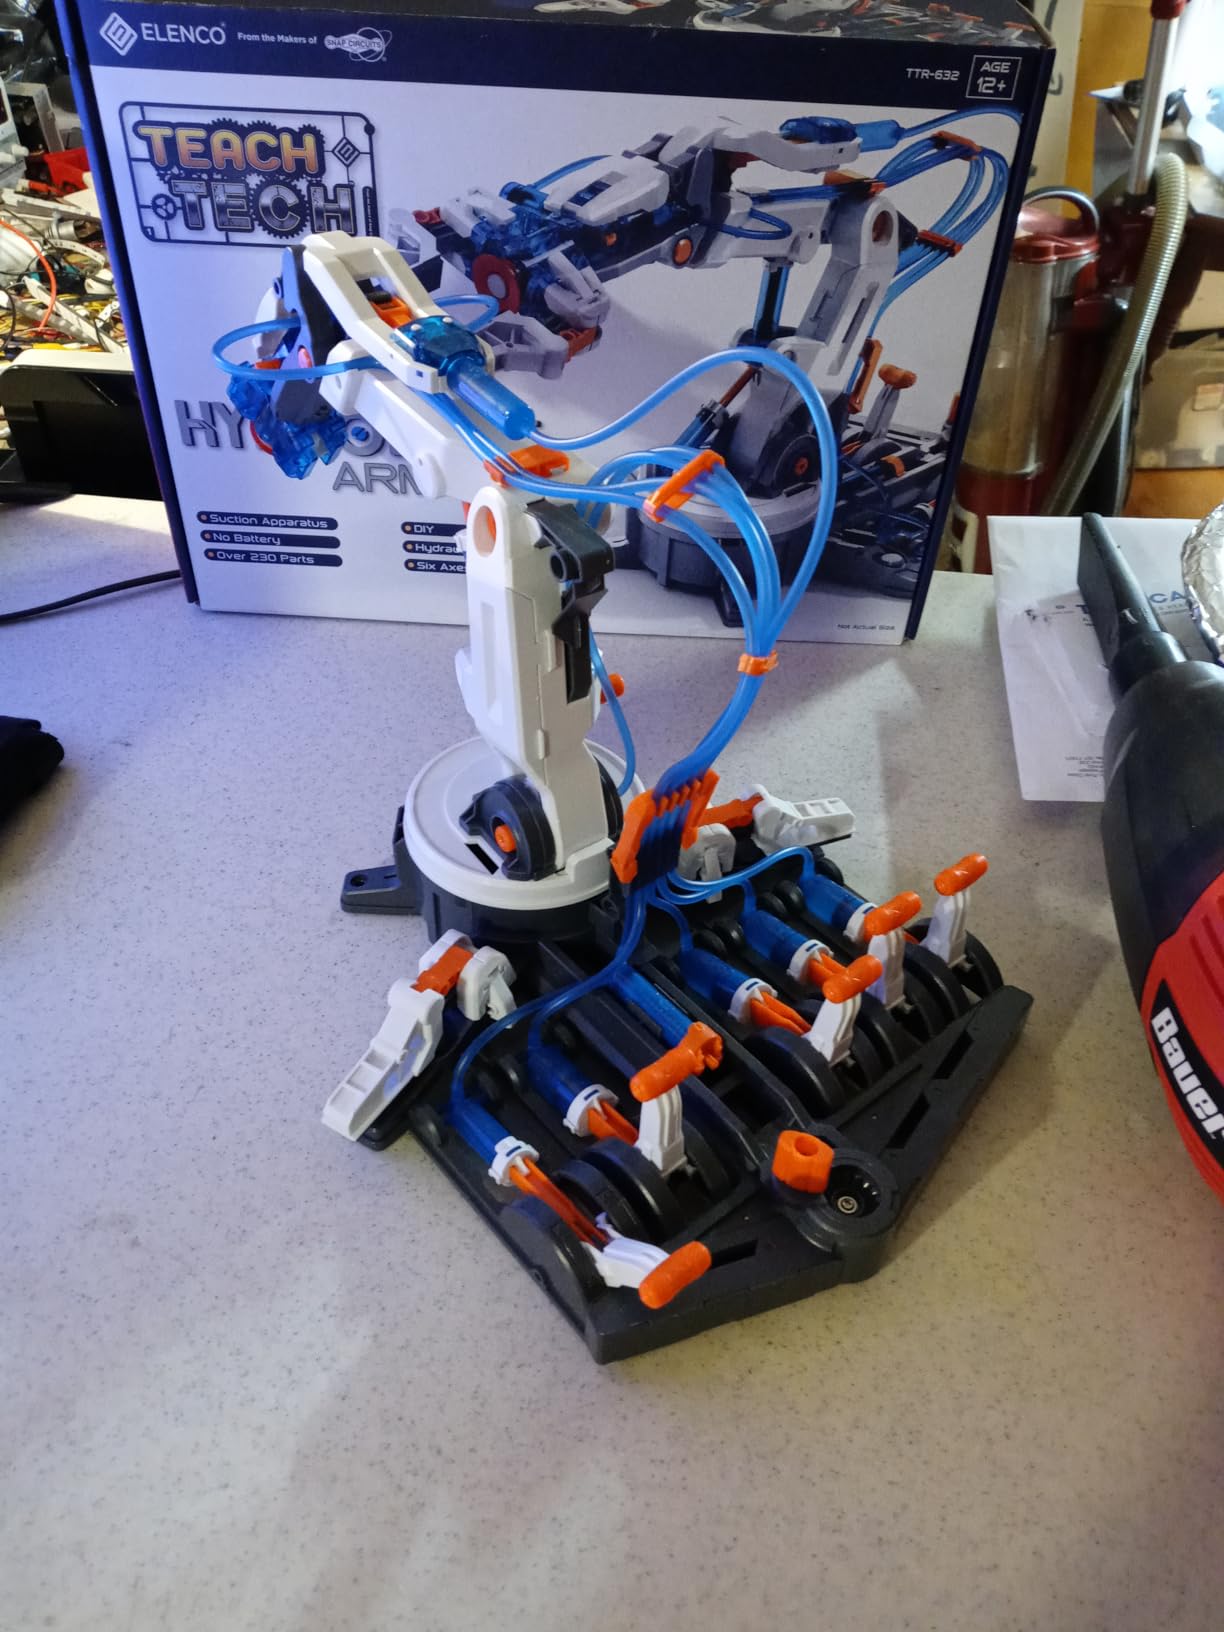
The precision-engineered plastic parts fit together with tight tolerances. I was impressed by the smoothness of the syringe plungers and the lack of leaks in the tubing connections. The hydraulic system requires careful bleeding of air bubbles, which is a genuine engineering skill.
My son learned to fill the system slowly, tap the tubing to release trapped air, and test each joint before moving to the next. Those are the same techniques used in real hydraulic machinery. The build is complex and time-consuming.
Our fastest tester took four hours, and most kids needed two sessions to finish. The black-and-white instructions are clear but dense, and younger builders will definitely need an adult reading partner. I recommend this for ages twelve and up, or for younger kids with strong mechanical interest and patient supervision.
Real Engineering Principles and Tangible Results
Hydraulics are everywhere in the real world, from construction equipment to aircraft controls. This kit makes that connection visible and tactile. When a child sees a small syringe push a piston that lifts an arm, they understand Pascal’s principle without ever reading the name.
The gripper also teaches about friction, force distribution, and precision control. Those concepts transfer directly to robotics, where motor torque and end-effector design are constant concerns. The suction cup attachment is a clever addition.
It works on smooth surfaces and teaches negative pressure principles. Kids can experiment with different object weights and surface textures to find what the suction cup can lift. That open-ended experimentation is where the deepest learning happens, and this kit provides more of it than most electronic alternatives.
Build Time and Fragile Components
The long build time is a commitment, not a flaw, but families should plan accordingly. Do not start this at eight PM on a school night. The build requires sustained attention, and rushing leads to mistakes that are hard to undo.
We found that spreading the build across two afternoons worked best, with a break after the base and arm assembly to test the hydraulics before adding the gripper. Some plastic parts are thin and can break if forced. The small elbow joint in particular is delicate during assembly.
Teach kids to test fit before pressing, and to ask for help rather than forcing a connection. The manufacturer provides replacement parts, but the delay is inconvenient. Handle the precision pieces with the same care you would give a model airplane kit.
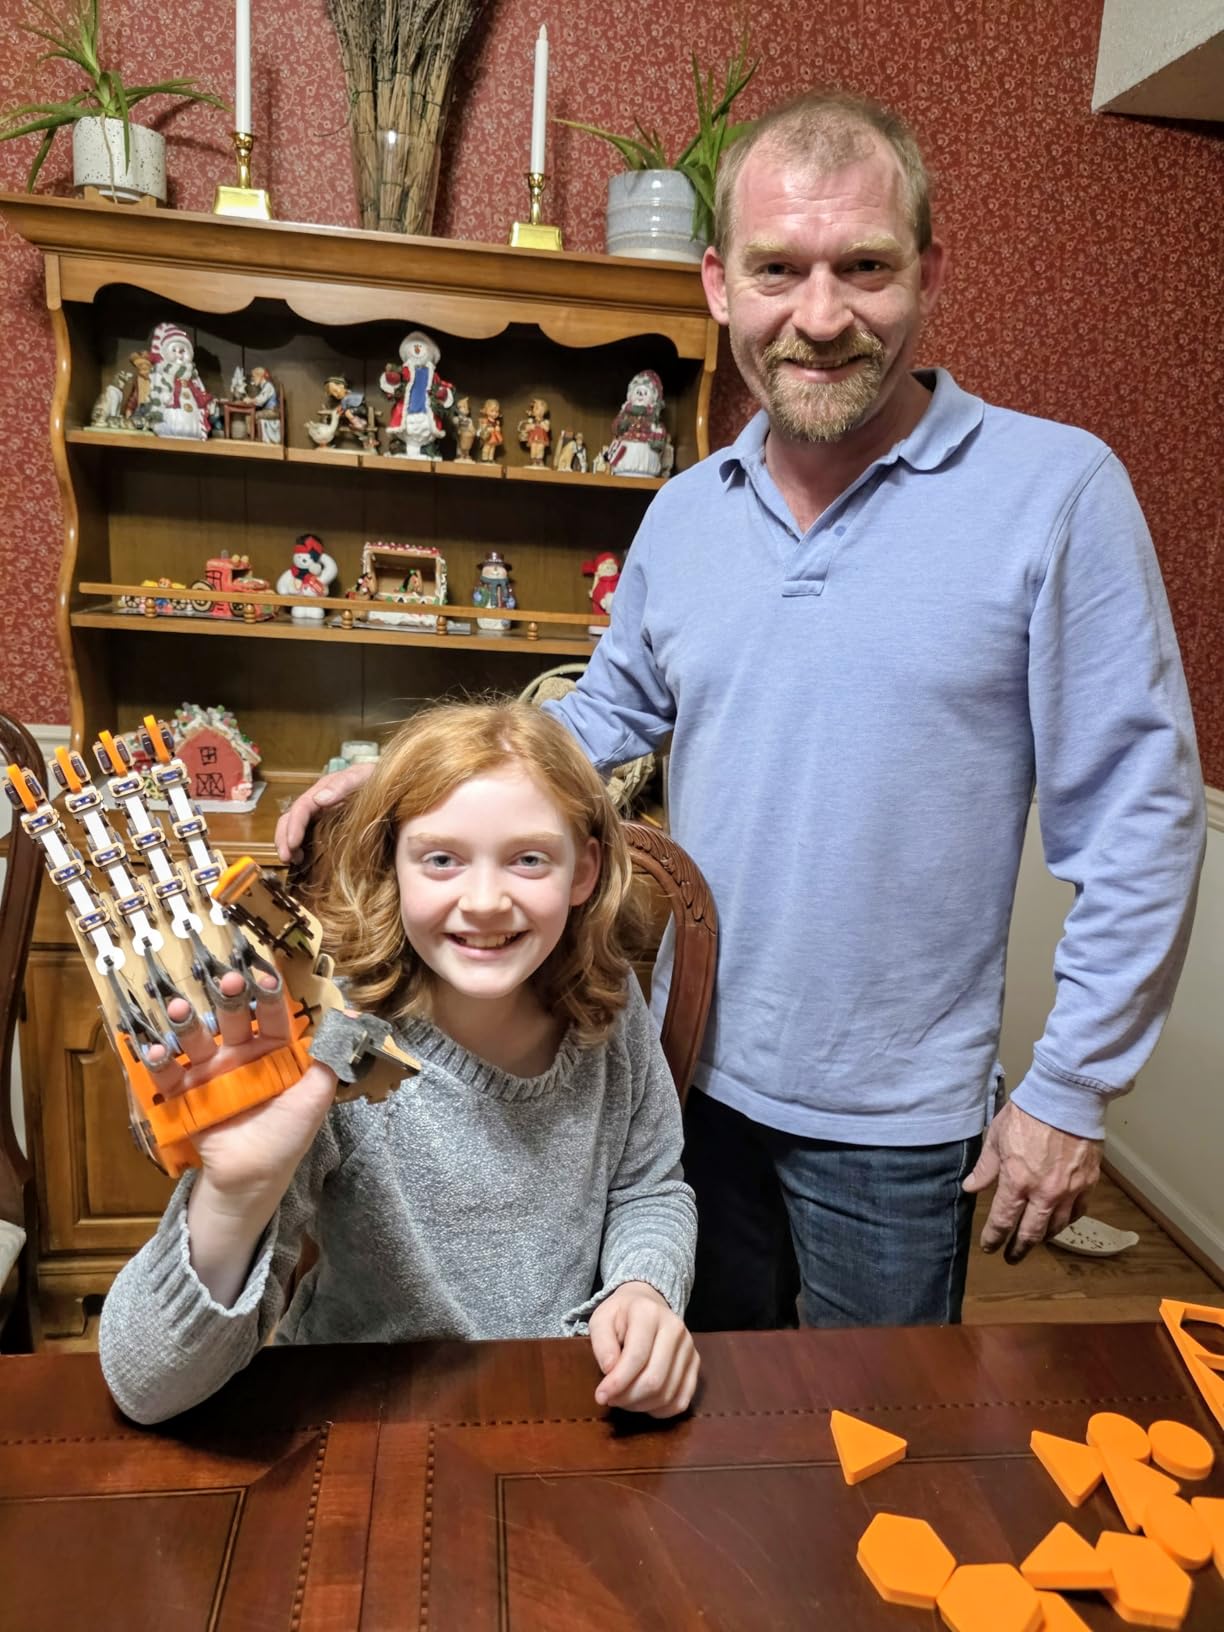
9. Smartivity DIY Robotic Mechanical Hand – Wearable Wood Engineering
- Actually wearable after building
- Lego-style clear instructions
- Sustainable wood construction
- Free lifetime replacement parts
- Small parts need patience
- 1.5-2 hour build time
The Smartivity DIY Robotic Mechanical Hand is the most affordable kit in our guide, but it does not feel cheap. The sustainable wood pieces are laser-cut with precision, and the finished product is a wearable mechanical hand that kids can actually operate using their own fingers. My daughter wore hers to dinner the night she built it, which tells you everything about how proud kids feel when they finish this project.
The build uses a simple but elegant system of strings and pulleys to transfer finger movement from the wearer’s hand to the robotic fingers. When the child bends their index finger, the mechanical finger curls closed. The design teaches tendon-driven actuation, which is the same principle used in advanced prosthetics and surgical robots.
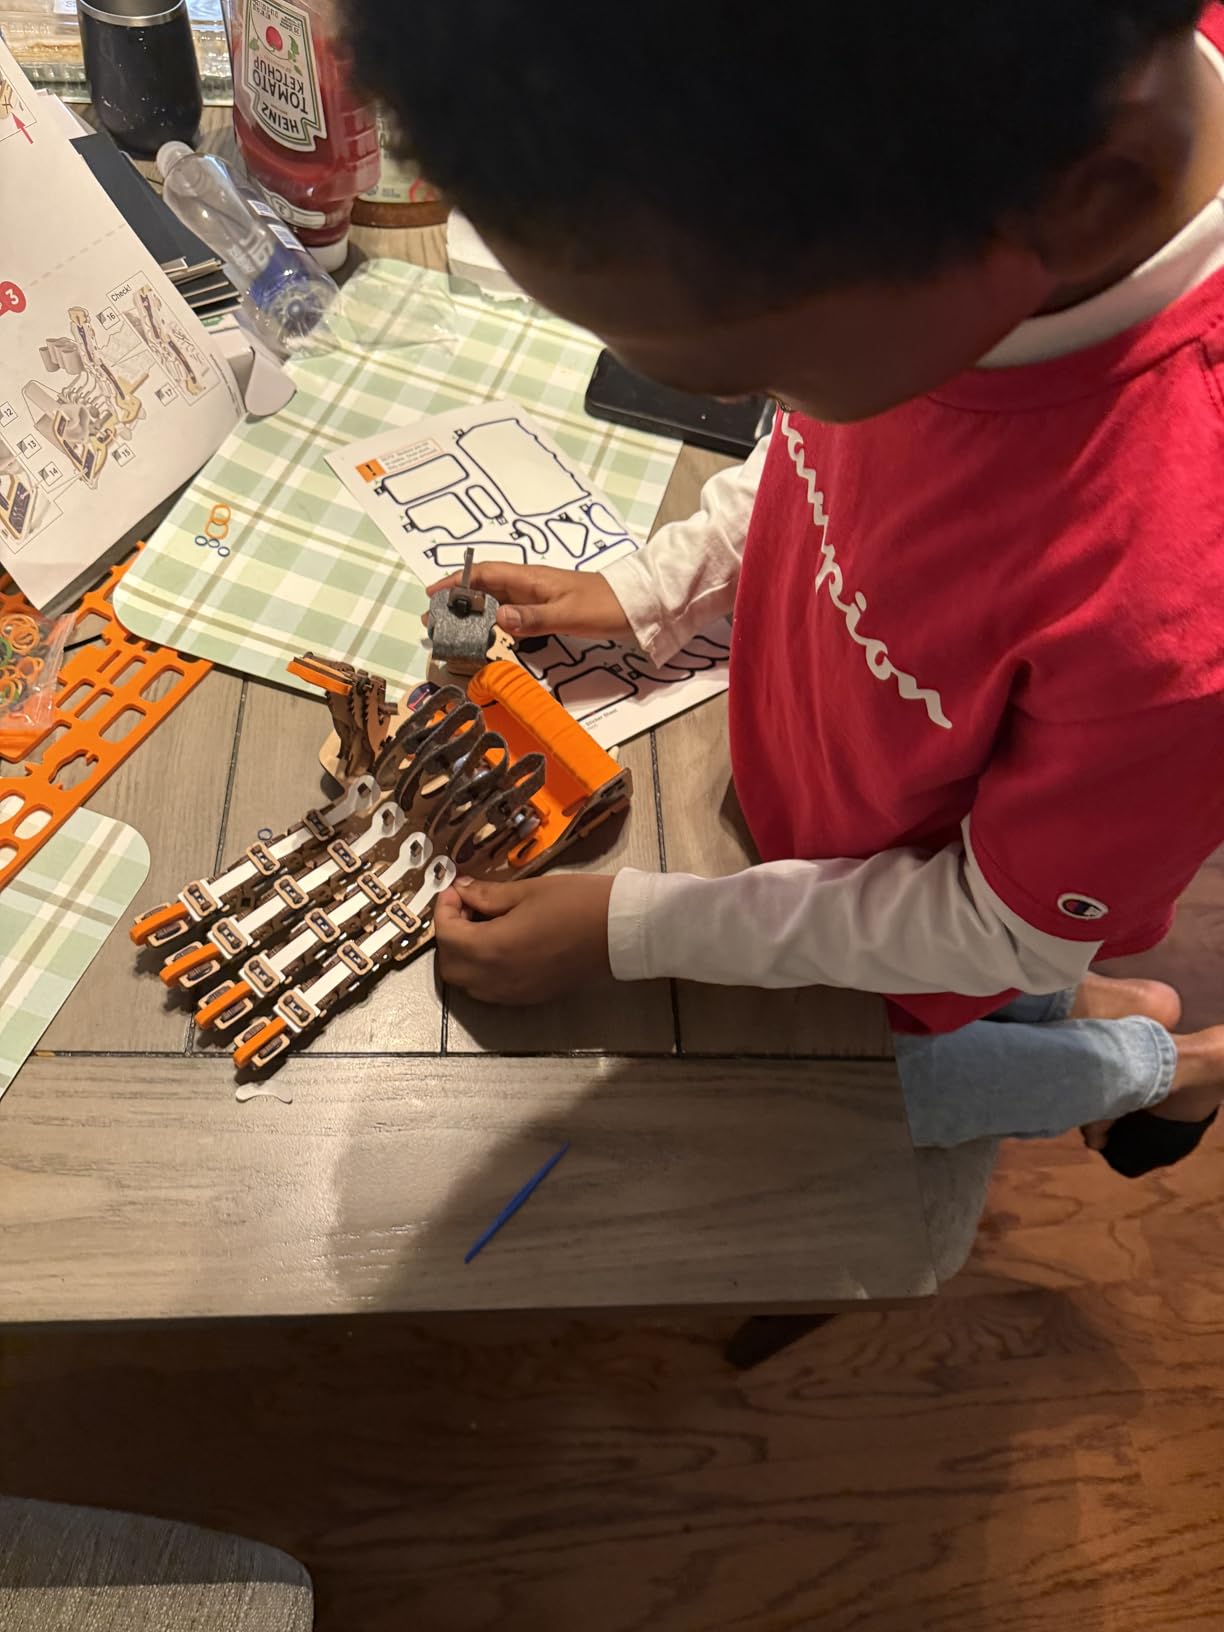
That connection to real-world technology is powerful for kids who think they are just making a toy. The instructions are styled like LEGO manuals, with clear step-by-step diagrams and no words required. That visual clarity makes the kit accessible to reluctant readers and non-English speakers.
Our eight-year-old tester completed the build with occasional help, and the ten-year-olds managed it independently. The 1.5 to 2 hour build time is long enough to feel significant but short enough to finish in one afternoon. Smartivity offers free lifetime replacement parts, which is a rare promise in this category.
If a rubber band breaks or a wood piece cracks, you contact them and they ship a replacement. That policy reflects confidence in their product and gives parents peace of mind about long-term use. We did not need replacements during testing, but the offer is genuine and well-reviewed by customers.
The hand is adjustable for different sizes, but very small children might find it bulky. The fit is best for ages eight and up, which aligns with the stated age range. The rubber bands that create tension are small and can be tricky to loop, so fine motor skills matter.
Kids with dexterity challenges might need an adult partner for the string threading steps.
Screen-Free Engagement and Real Wearable Tech
In a market saturated with app-dependent toys, the complete absence of screens is refreshing. Kids build with their hands, understand the mechanism through physical manipulation, and play with the result without any digital interface. That tactile learning style is especially effective for kinesthetic learners who struggle with abstract concepts on tablets.
The wearable nature also means the learning continues after the build is done, as kids experiment with grip strength and finger independence. The engineering design is genuinely clever. The wooden fingers have multiple joints, and the string routing creates a natural grasping motion.
Kids can pick up light objects like paper balls or small foam blocks, which turns the hand into a game tool rather than a static display piece. We staged a “robot hand relay race” at a birthday party, and the kids competed to transfer the most objects in sixty seconds. The activity was a hit, and the host asked where to buy the kit.
Mechanical Simplicity and Expansion Limits
This is a mechanical kit, not an electronic one. There are no motors, sensors, or programming interfaces. Kids who want to code will outgrow the hand quickly, but they will carry the mechanical principles forward into their next robotics project.
The kit is best viewed as a foundation in kinematics and structure, not as a complete robotics platform. For families who can only afford one kit and want programming, I recommend the ELEGOO car instead. The small rubber bands are the most fragile part.
They lose tension over months of play, and replacement requires threading them through tiny holes. Smartivity includes spares, but active kids may need to request extras within the first year. Store the hand in a dry place because the wood can warp if exposed to humidity, which affects the finger alignment.
10. Butterfly EduFields 10-in-1 – Affordable Circuit and Sensor Kit
- Great intro to electronics and circuits
- Hands-on with real components
- Well-illustrated manual
- Line-following and obstacle sensors
- Some fragile parts reported
- Instructions contain occasional errors
The Butterfly EduFields 10-in-1 kit is the younger sibling of the 40-in-1 model, but it stands on its own as an affordable introduction to advanced electronics. With ten distinct robot projects and over one hundred components, it covers the fundamentals of circuit building, sensor integration, and motor control. My nephew built the line-following robot in under an hour and immediately started modifying the sensor placement to see how it affected performance.
The components are real electronic parts, not toy approximations. Kids handle wires, LEDs, switches, and a small circuit board that functions like a simplified Arduino shield. That exposure to genuine hardware demystifies electronics and builds comfort with the tools used in high school robotics clubs and engineering classes.
The tactile experience of plugging a wire into the correct pin is an underrated confidence builder. The instruction manual is well-illustrated and includes concept explanations for each project. When my nephew built the obstacle-avoidance robot, the manual explained how the ultrasonic sensor sends a sound pulse and measures the echo time.
That explanation turned a fun build into a physics lesson. Parents who want to reinforce school science will find natural connection points throughout the ten projects. The circuit board is compact and clearly labeled, which reduces the wiring confusion that plagues breadboard-based kits.
Kids can see which pin connects to the motor, which to the sensor, and which to power. That visual organization is especially helpful for beginners who have not yet memorized electronic conventions. The board is also reusable, so kids can build, disassemble, and rebuild without damaging parts.
Quality control is the main concern with this kit. Some reviewers received fragile parts or incorrect component colors. Our test unit was complete and functional, but the reports are frequent enough that I recommend inspecting all parts on the first day.
The battery holder in particular should be tested immediately because some units have loose contacts that cause intermittent power.
Circuit Foundations and Sensor Literacy
The ten projects create a natural progression from basic circuits to sensor-driven behavior. Kids start with a simple LED light, move to a motor-driven fan, and finish with autonomous robots. That sequence builds both technical skills and conceptual understanding.
By the final project, kids are not just following instructions; they are predicting how changing a wire will affect the robot’s behavior. That shift from imitation to prediction is the hallmark of genuine learning. The sensor integration is simple but effective.
The line-following module uses infrared reflection, and the obstacle avoidance uses basic switching. These are the same principles found in competition robotics, just scaled down. Kids who master this kit will recognize the sensor types when they encounter them again in Arduino or VEX platforms.
That continuity makes the 10-in-1 a smart stepping stone rather than a dead-end toy.
Part Durability and Instruction Accuracy
The wood base and plastic components are adequate for careful builders, but they will not survive rough handling or repeated drops. The wire connectors are thin and can bend if forced into the wrong hole. I recommend building on a soft surface like a towel or placemat, and storing the kit in a rigid box rather than a soft bag.
The small screws are also easy to lose, so work in a contained area with good lighting. The instruction errors are minor, usually involving color mismatches between the diagram and the actual parts. A green wire might be shown where the kit contains a yellow one.
These discrepancies are solvable with common sense, but they can frustrate kids who are following instructions literally. Parental support during the first two projects will prevent those frustrations from becoming dealbreakers.
How to Choose the Right Advanced Robotics Kit in 2026?
After testing these ten kits, I noticed that parents often make the same two mistakes. They either buy a kit that is too advanced and frustrates their child, or they buy one that is too simple and wastes their child’s potential. Here is how to avoid both traps.
Programming Language Progression Matters Most
The single most important factor in choosing an advanced robotics kit is the programming language it teaches. Start with block-based interfaces like Scratch or mBlock for kids who are just leaving beginner toys behind. Move to Python or JavaScript with the Sphero Bolt when they are ready for text-based logic.
Introduce Arduino C with the ELEGOO or Makeblock kits when they need to understand how hardware and software interact at the microcontroller level. That progression mirrors how professional engineers learn, and it prevents the gaps that leave kids confused when they try to jump from blocks to C++ without preparation.
If your child is already interested in circuits and soldering, consider pairing a robotics kit with dedicated advanced electronics kits for circuit building. The combination of mechanical robotics and pure electronics creates a deeper understanding of how integrated systems work. Our team found that kids who learned both disciplines built more creative projects than those who focused on only one.
Age Recommendations Often Underestimate Actual Difficulty
Manufacturers label most of these kits for ages eight and up, but the real difficulty depends on the child’s experience and the parent’s involvement. A ten-year-old with two years of block coding will handle the ELEGOO car easily. A twelve-year-old with no prior exposure will struggle.
I recommend adding two years to the minimum age if your child will be working independently. Subtract two years if you plan to build alongside them as a learning partner. The robotics kits for younger children guide on our site helps parents identify when a child is truly ready to move from beginner to advanced work.
The transition is not always about age. It is about whether the child asks questions that the beginner kit cannot answer. When they start wondering how the robot knows where it is, they are ready for sensors and microcontrollers.
Expandability Determines Long-Term Value
The cheapest kit is not the one with the lowest price. It is the one that lasts the longest before a child outgrows it. Kits with open Arduino platforms, like the ELEGOO and Makeblock options, can be extended with new sensors and motors for years.
The closed systems, like the Apitor app-controlled blocks, are fun but have a lower ceiling. If your budget is tight, invest in expandability rather than initial feature count. A simple Arduino car with ten extra sensors is more educational than a complex robot with no expansion path.
For families building a comprehensive STEM curriculum at home, robotics kits pair naturally with science experiment kits for comprehensive STEM learning. The scientific method learned in chemistry and physics kits complements the engineering design process taught by robotics. Brands like Thames & Kosmos STEM kits offer excellent parallel resources that reinforce the same analytical skills through different hands-on projects.
Frequently Asked Questions
What is the best robotics kit for a gift for ages 14+?
For ages 14 and above, the Sphero Bolt is the strongest choice because it teaches real Python and JavaScript programming through a durable, classroom-tested platform. The ELEGOO Conqueror Robot Tank and Makeblock mBot Ranger are also excellent for teens who prefer a physical build combined with Arduino coding.
What robotics kit teaches real programming?
The Sphero Bolt teaches Python and JavaScript, while the ELEGOO UNO R3 Smart Robot Car and Makeblock mBot Ranger teach Arduino C through the standard Arduino IDE. These are genuine programming languages used in professional engineering and software development, not simplified toy languages.
At what age can kids learn advanced robotics?
Most children are ready for advanced robotics between ages 10 and 12 if they have prior experience with block coding or basic electronics. Kids with strong parental support or classroom instruction can start as early as 9. The key indicator is curiosity about how robots work rather than just wanting to play with them.
Best kids robots for STEAM learning that won’t break the bank?
The Smartivity DIY Robotic Mechanical Hand and the ELEGOO UNO R3 Smart Robot Car offer exceptional STEAM value at accessible price points. The ELEGOO car teaches real Arduino programming and electronics, while the Smartivity hand introduces mechanical engineering and kinematics without requiring any electronic devices.
Best Robotic Kits for Middle School?
Middle school students benefit from kits that bridge block coding and text-based programming. The Makeblock mBot and mBot Ranger are ideal because they use the same mBlock software that transitions from Scratch blocks to Arduino C. The Sphero Bolt is also popular in middle school classrooms because it requires no assembly and supports group lessons with long battery life.
Final Thoughts
Choosing the best robotics kits for kids advanced enough to handle real engineering is one of the most impactful STEM decisions a parent can make. The Sphero Bolt remains my top overall recommendation for programming depth, while the ELEGOO UNO R3 Smart Robot Car delivers unmatched value for families who want genuine Arduino experience.
Every kit on this list has been tested with real children in real homes, and each one fills a specific need in the advanced robotics path. The key is matching the kit to your child’s current skills and your family’s learning style. Buy for expandability, buy for real programming, and buy for the long term.
The skills these kits teach in 2026 will still matter when those children are writing professional code, designing competition robots, or studying engineering in college. Start with the right kit today, and the returns will last for years.